

Pipeline : Wordpress API Scraper for YouTube
Predominantly built for interacting with the youtube API. This plugin is what runs parkourpulse.com
1. Table of Contents
- 3.1. Built With
- 3.2. Installation
2. The Pipeline Project
The pipeline project was one where I wanted to be able to do the following:
- Query YouTube / Instagram for specific videos and download the results (video file, post content, meta, etc).
- Automatically create some cover art.
- Combine the videos to create a quick trailer.
- Export the results to my social media.
This then became the components of the pipeline project:
3. About The Project
The API Scraper was a project born out of wanting to build parkourpulse.com. Using wordpress, I wanted to pull various query data out of youtube and present it in a nice way.
This plugin grabs the data, filters it, maps it to post objects, imports them, housekeeps any old data and puts it all on a schedule.
3.1. Built With
This project was built with the following frameworks, technologies and software.
3.2. Installation
This was built with ACF PRO - Please make sure it is installed before installing this plugin.
These are the steps to get up and running with this plugin.
- Clone the repo into your wordpress plugin foldergit clone https://github.com/IORoot/wp-plugin__pipeline--api-scraper ./wp-content/plugins/pipeline-api-scraper
- Activate the plugin.
4. Usage
The API Scraper Wordpress plugin will allow you to get data from various API endpoints and output the results as posts into your custom post types / taxonomies.
This plugin is quite complicated and requires a lot of configuration. It was built to be a general Scraper rather than a specialised one that focuses on a single API.
It has many very powerful features that can be quite dangerous if not used correctly. However, this is also it's strength.
For more detailed usage, please see the Wiki.
Below is a brief description of each tab in the system:
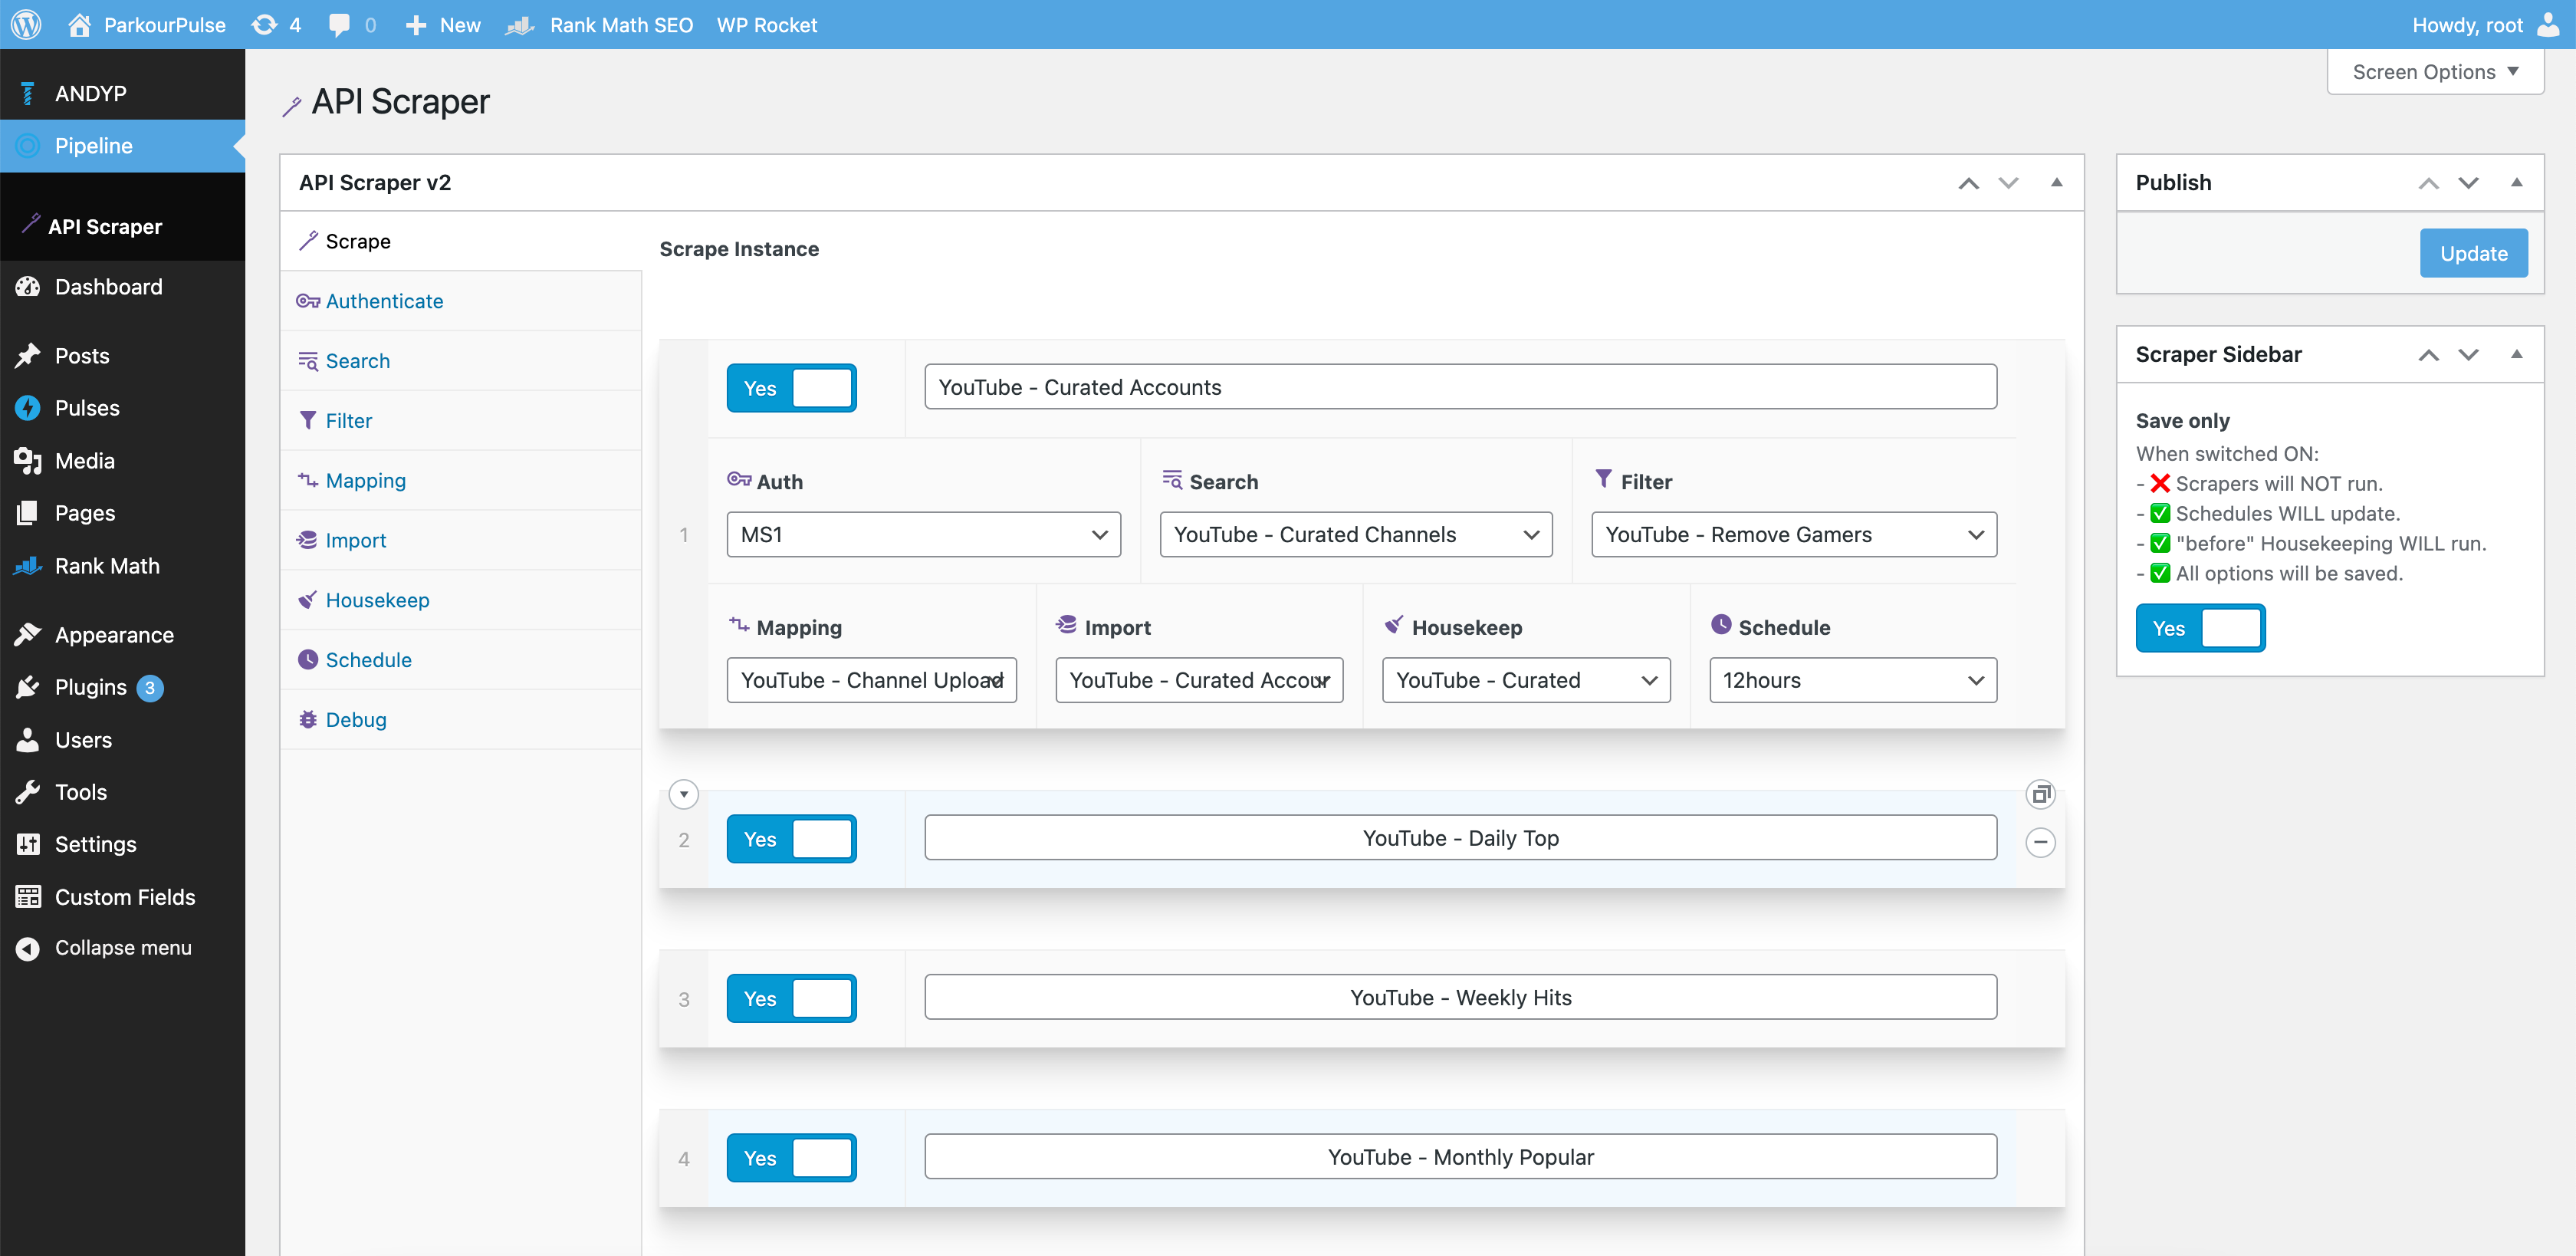
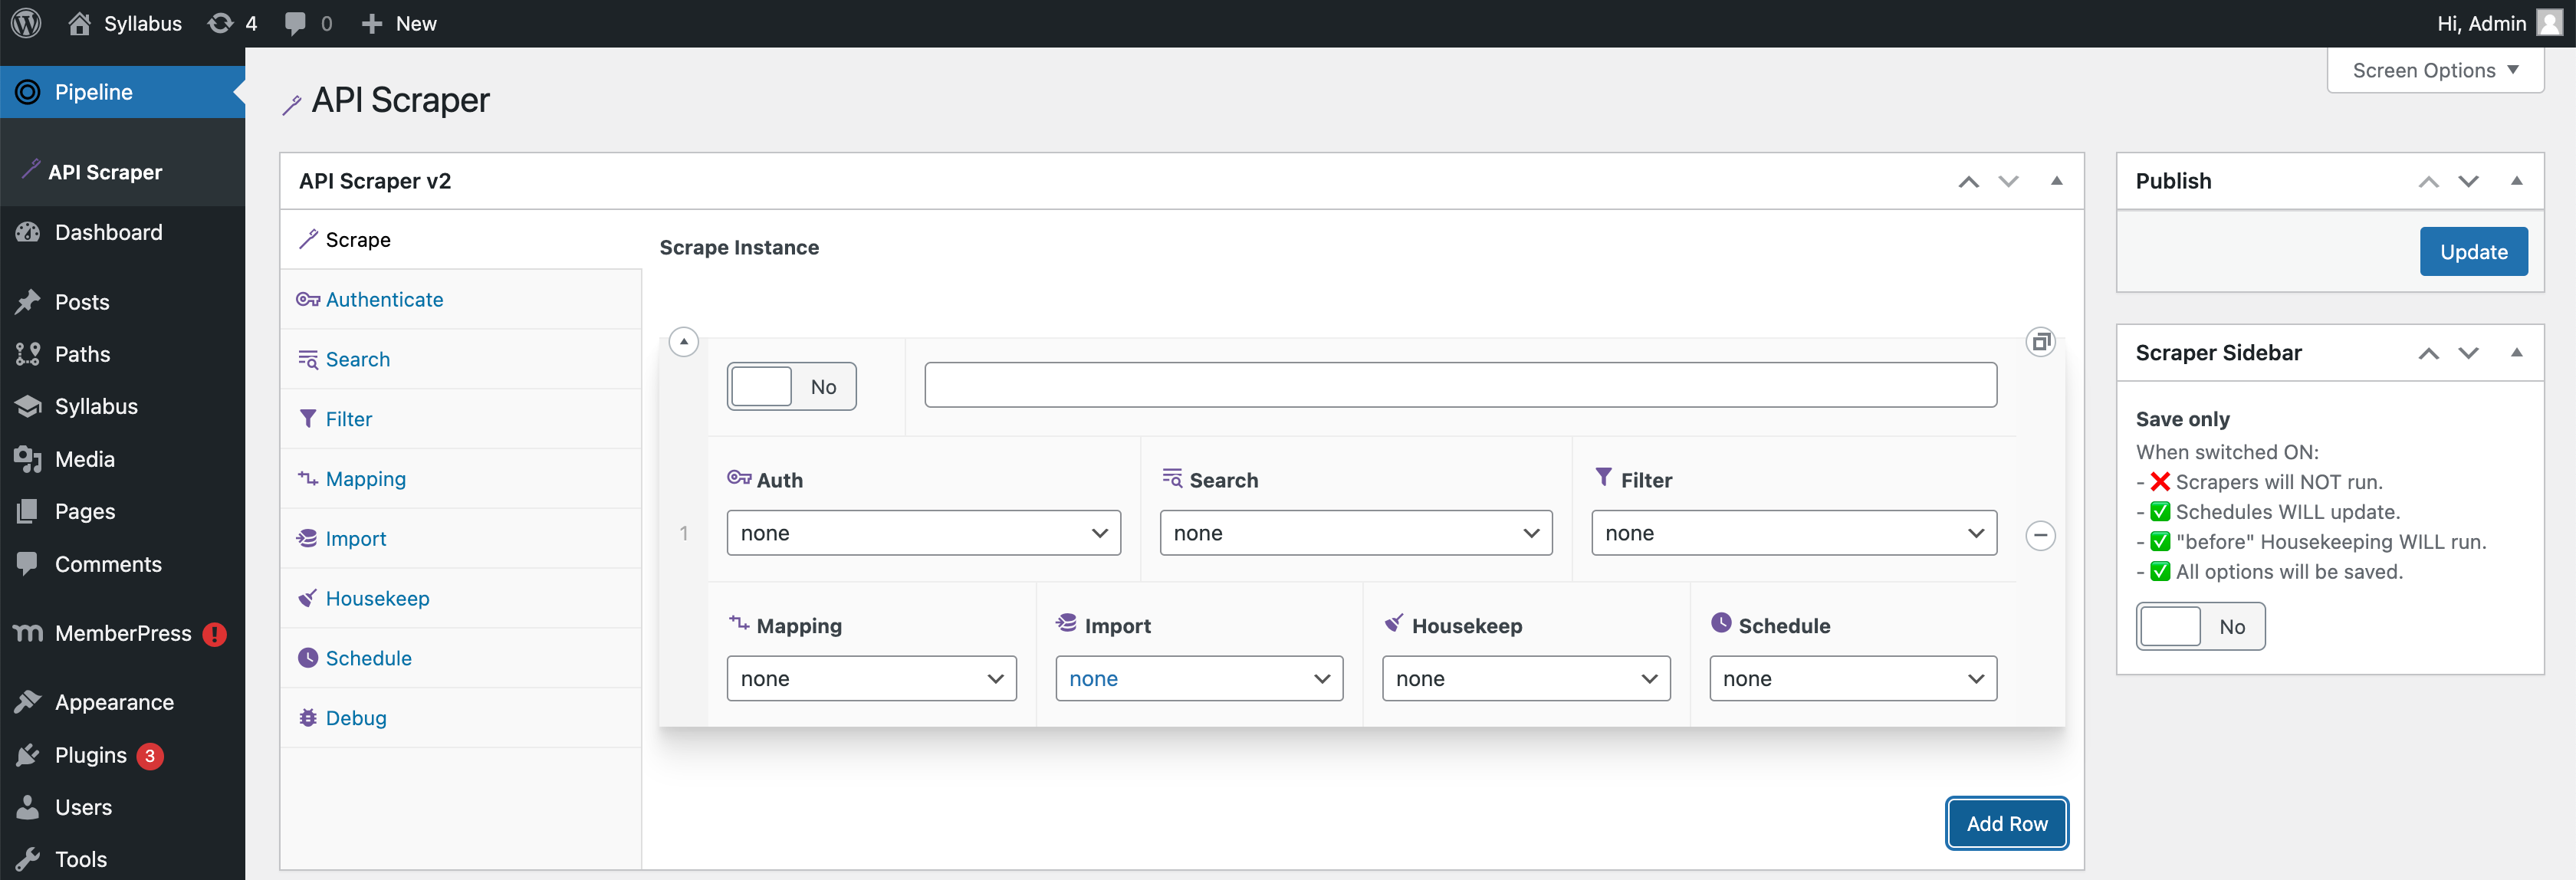
4.1. Scrape
The main controller. The 'scrape' tab allows you to select all of the other components that make up the scrape you're going to run.
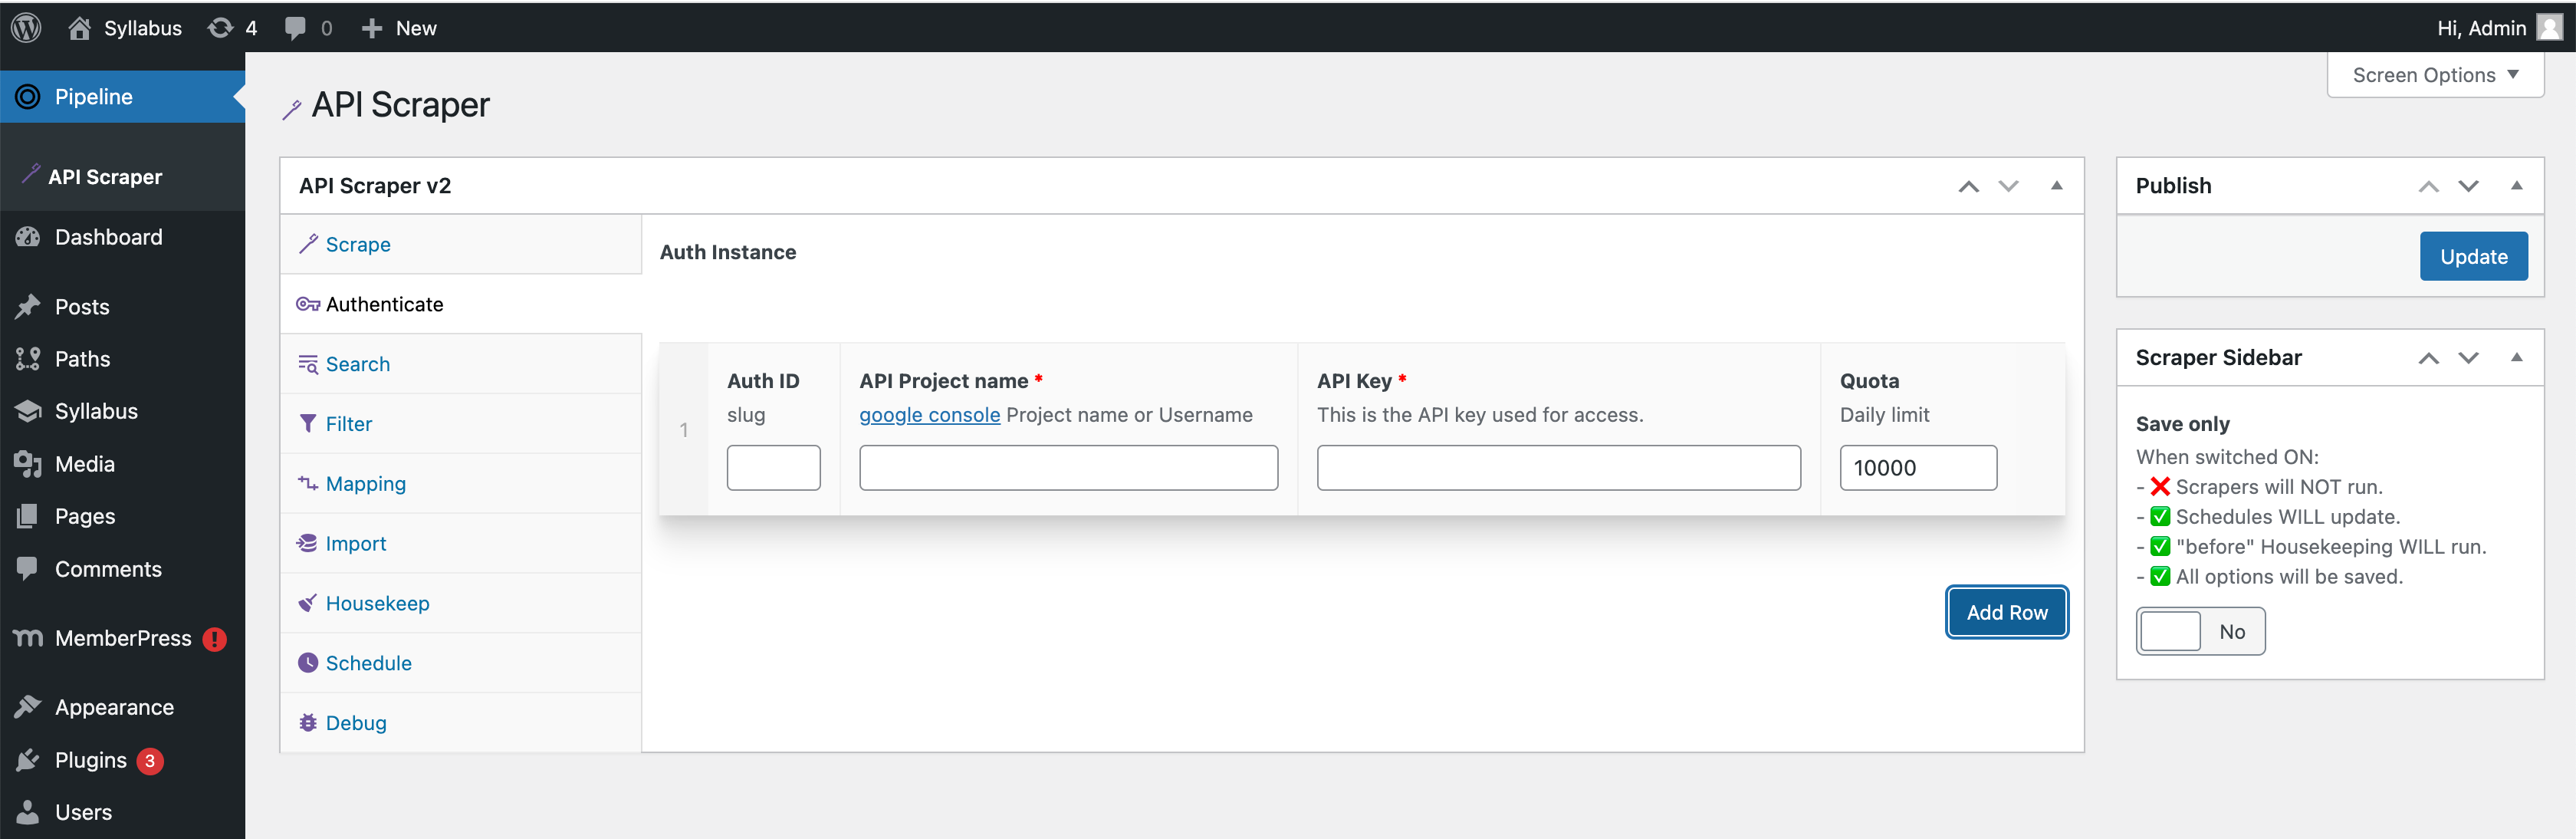
4.2. Authenticate
Any authentication methods for youtube APIs or other API's can be setup here.
This is handy for creating multiple youtube accounts and using them for different API Scrapes.
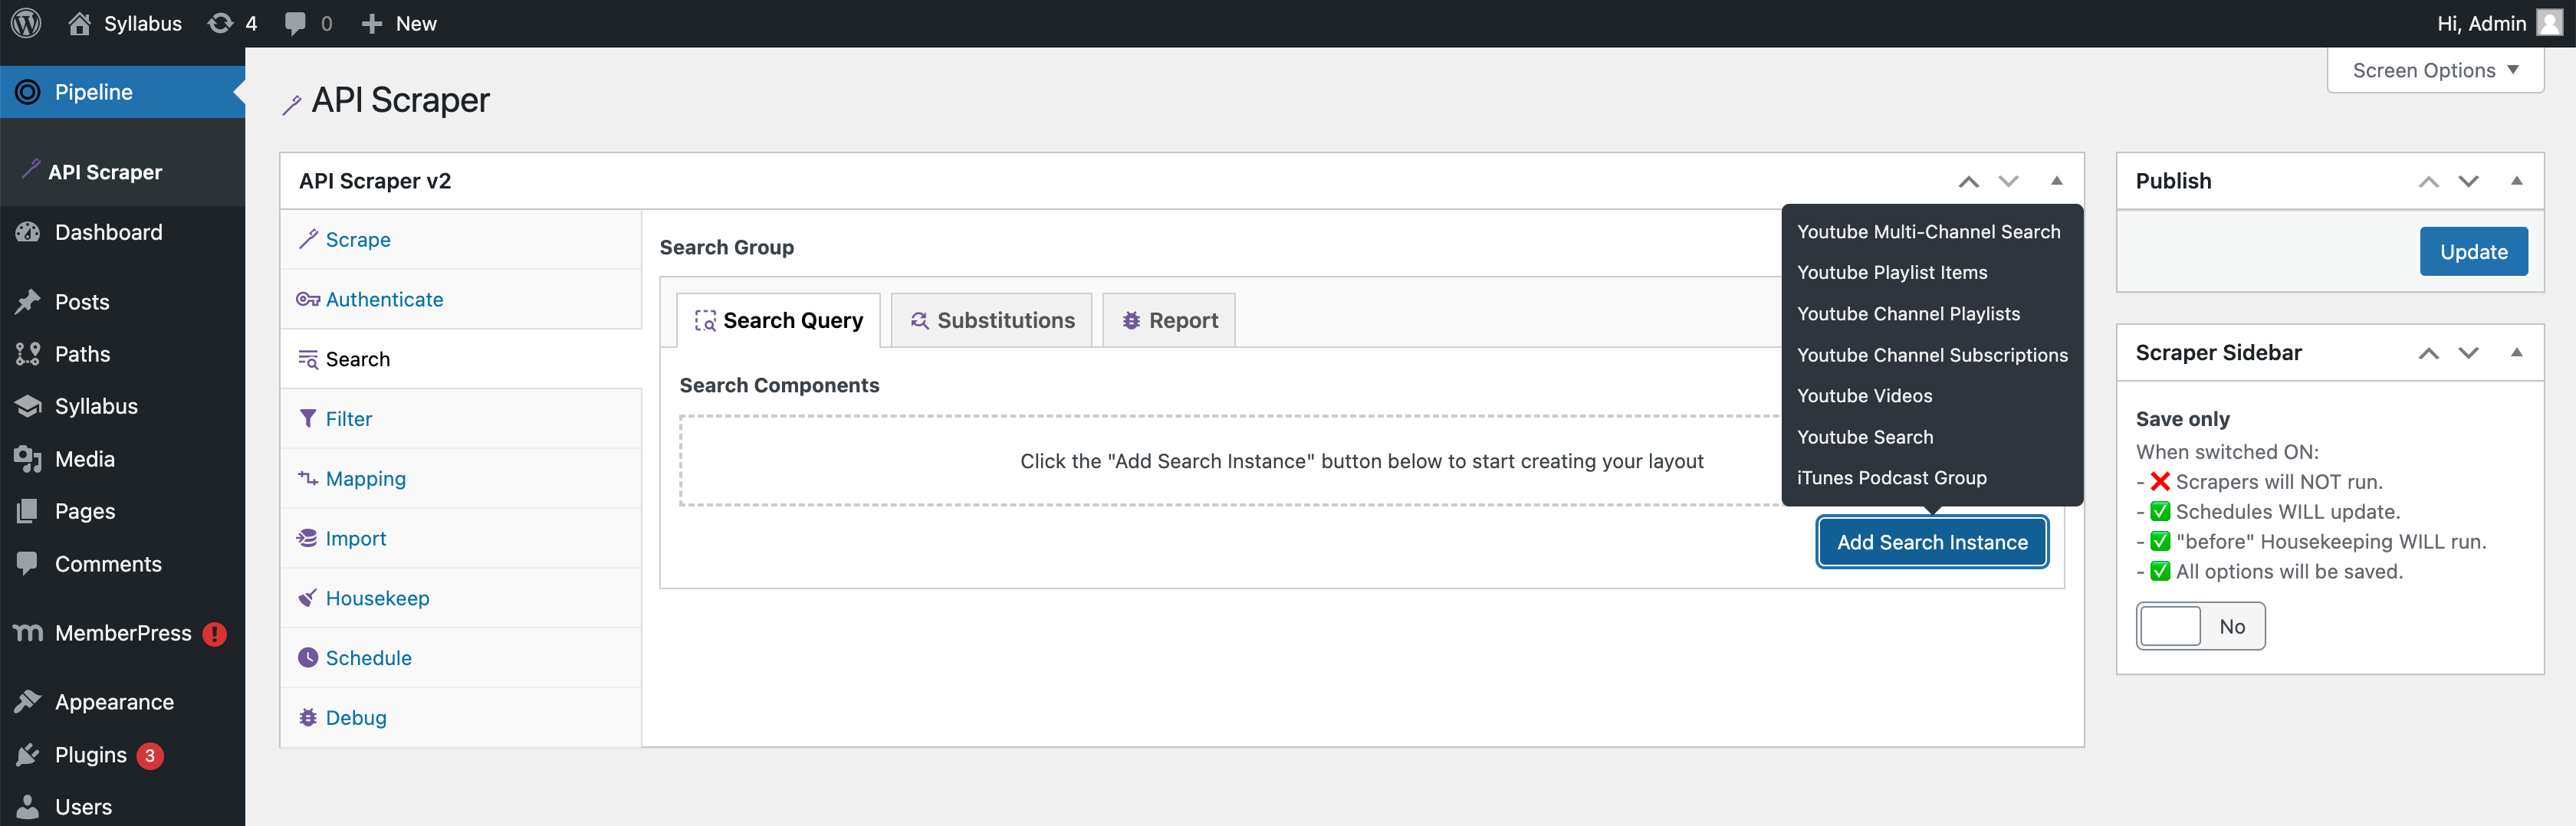
4.3. Search
The search is the main component of how you are going to use the YouTube API. You can specify what your search query will be.
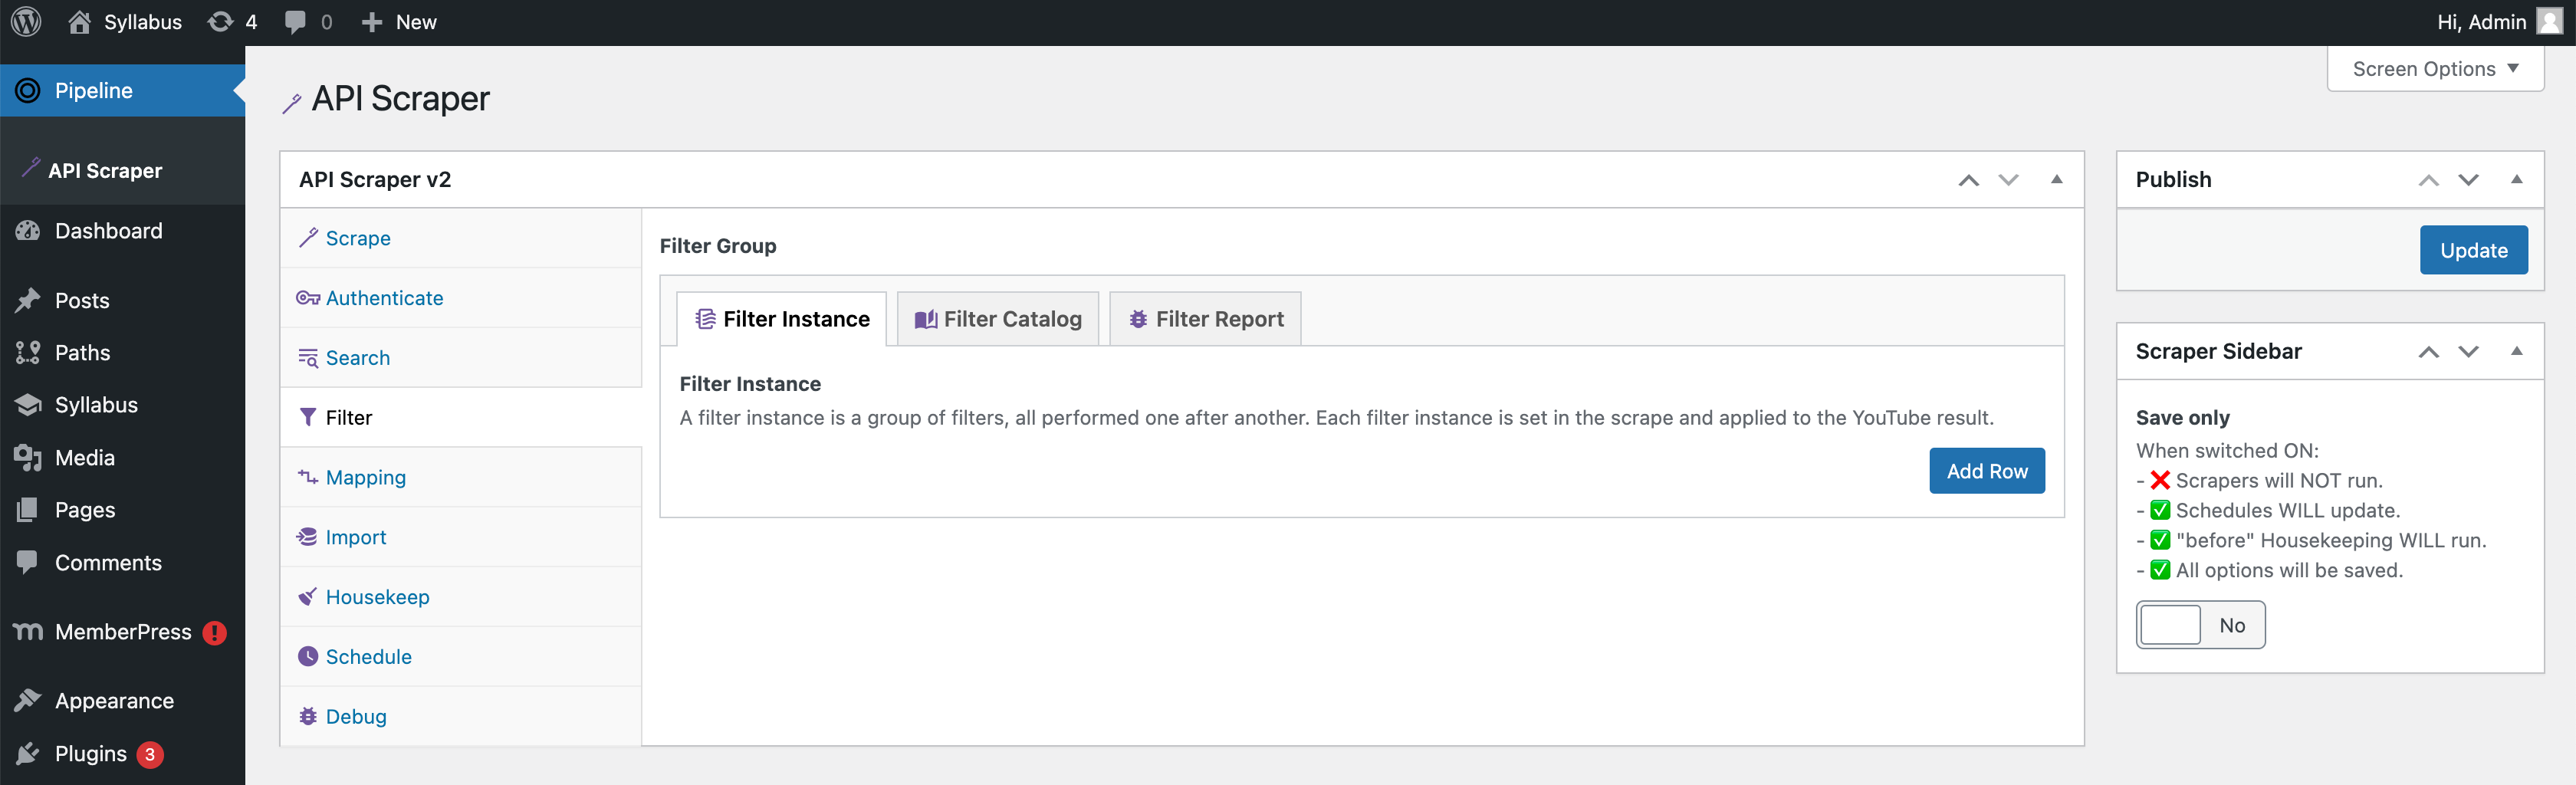
4.4. Filter
The filter is run once your search query has returned results. It will perform any dynamic filters required on the results.
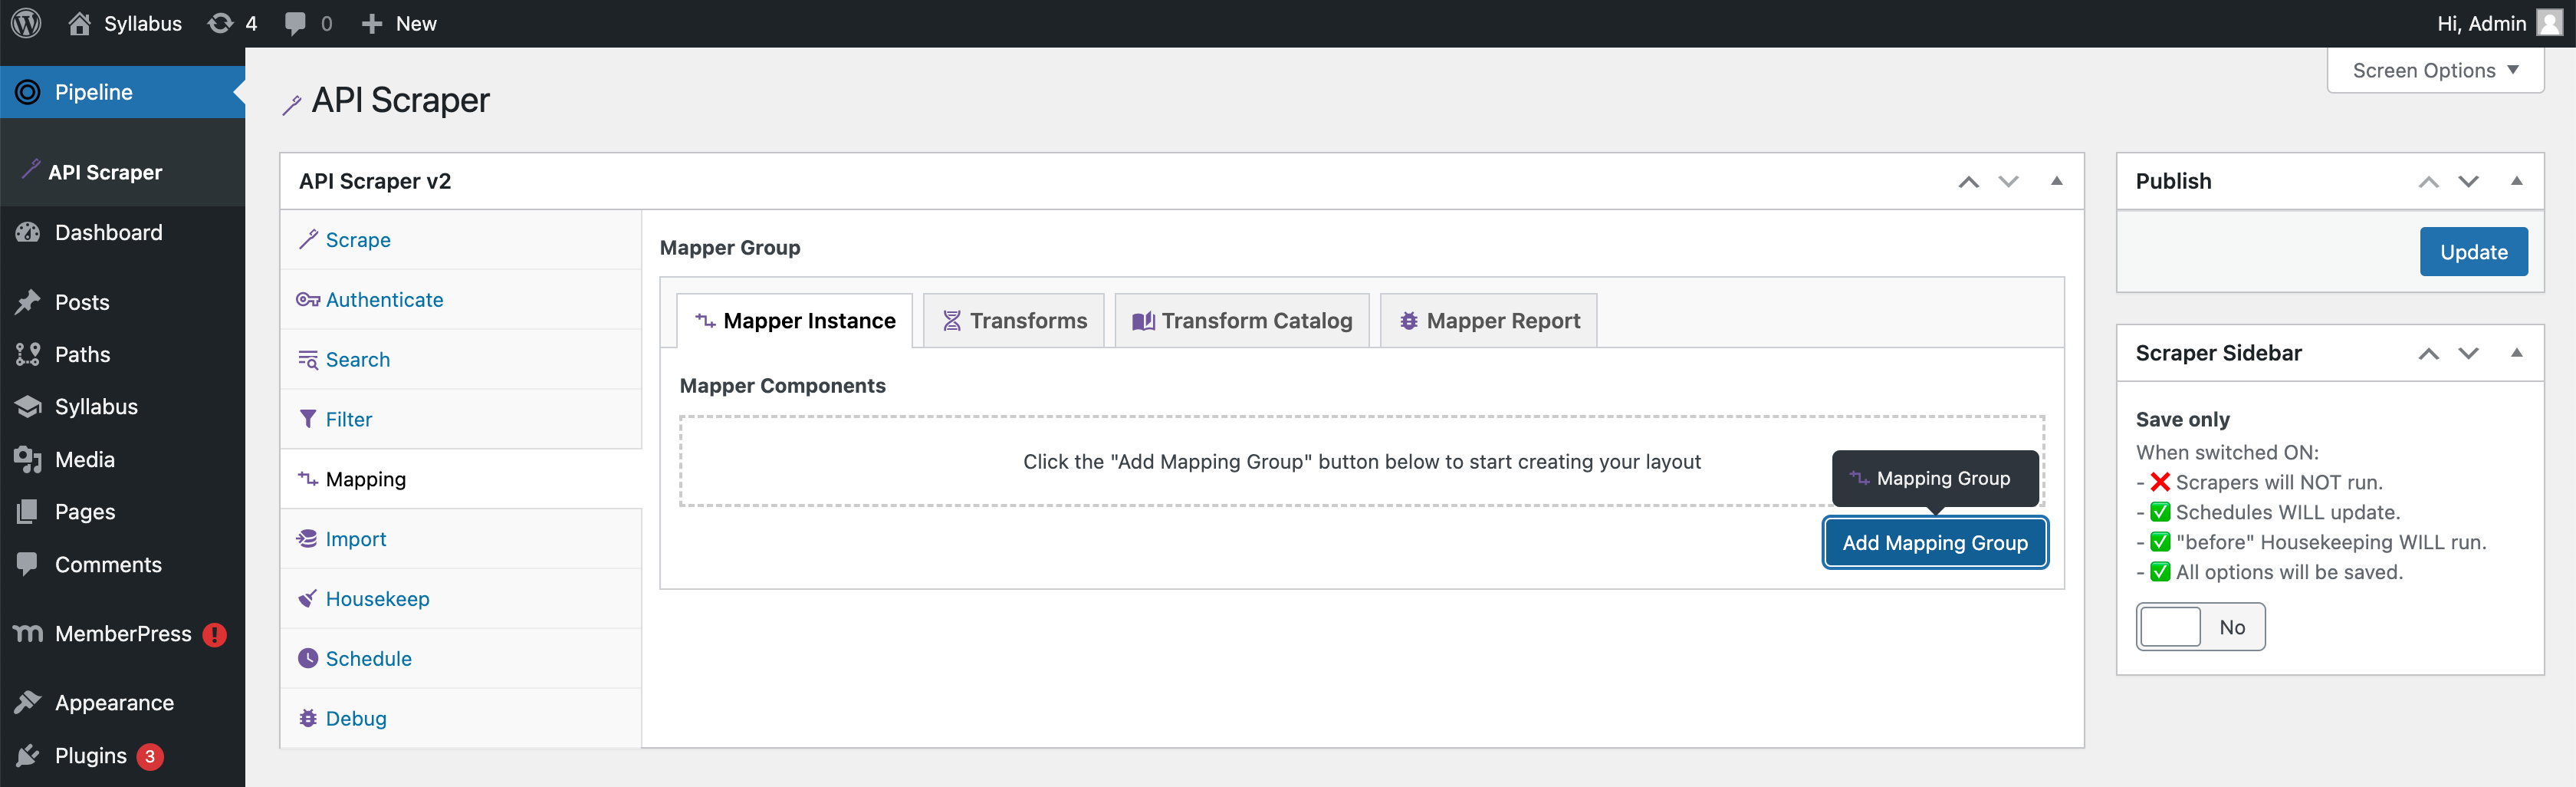
4.5. Mapping
Once the data has been retrieved and filtered you need to specify how your wordpress posts will be populated with that data.
Title, Post content, Images, Meta fields, etc... Map sources data to destination fields.
4.6. import
The mappings have been defined, but now the scraper needs to import the generated post into a particular post-type, taxonomy, category, etc...

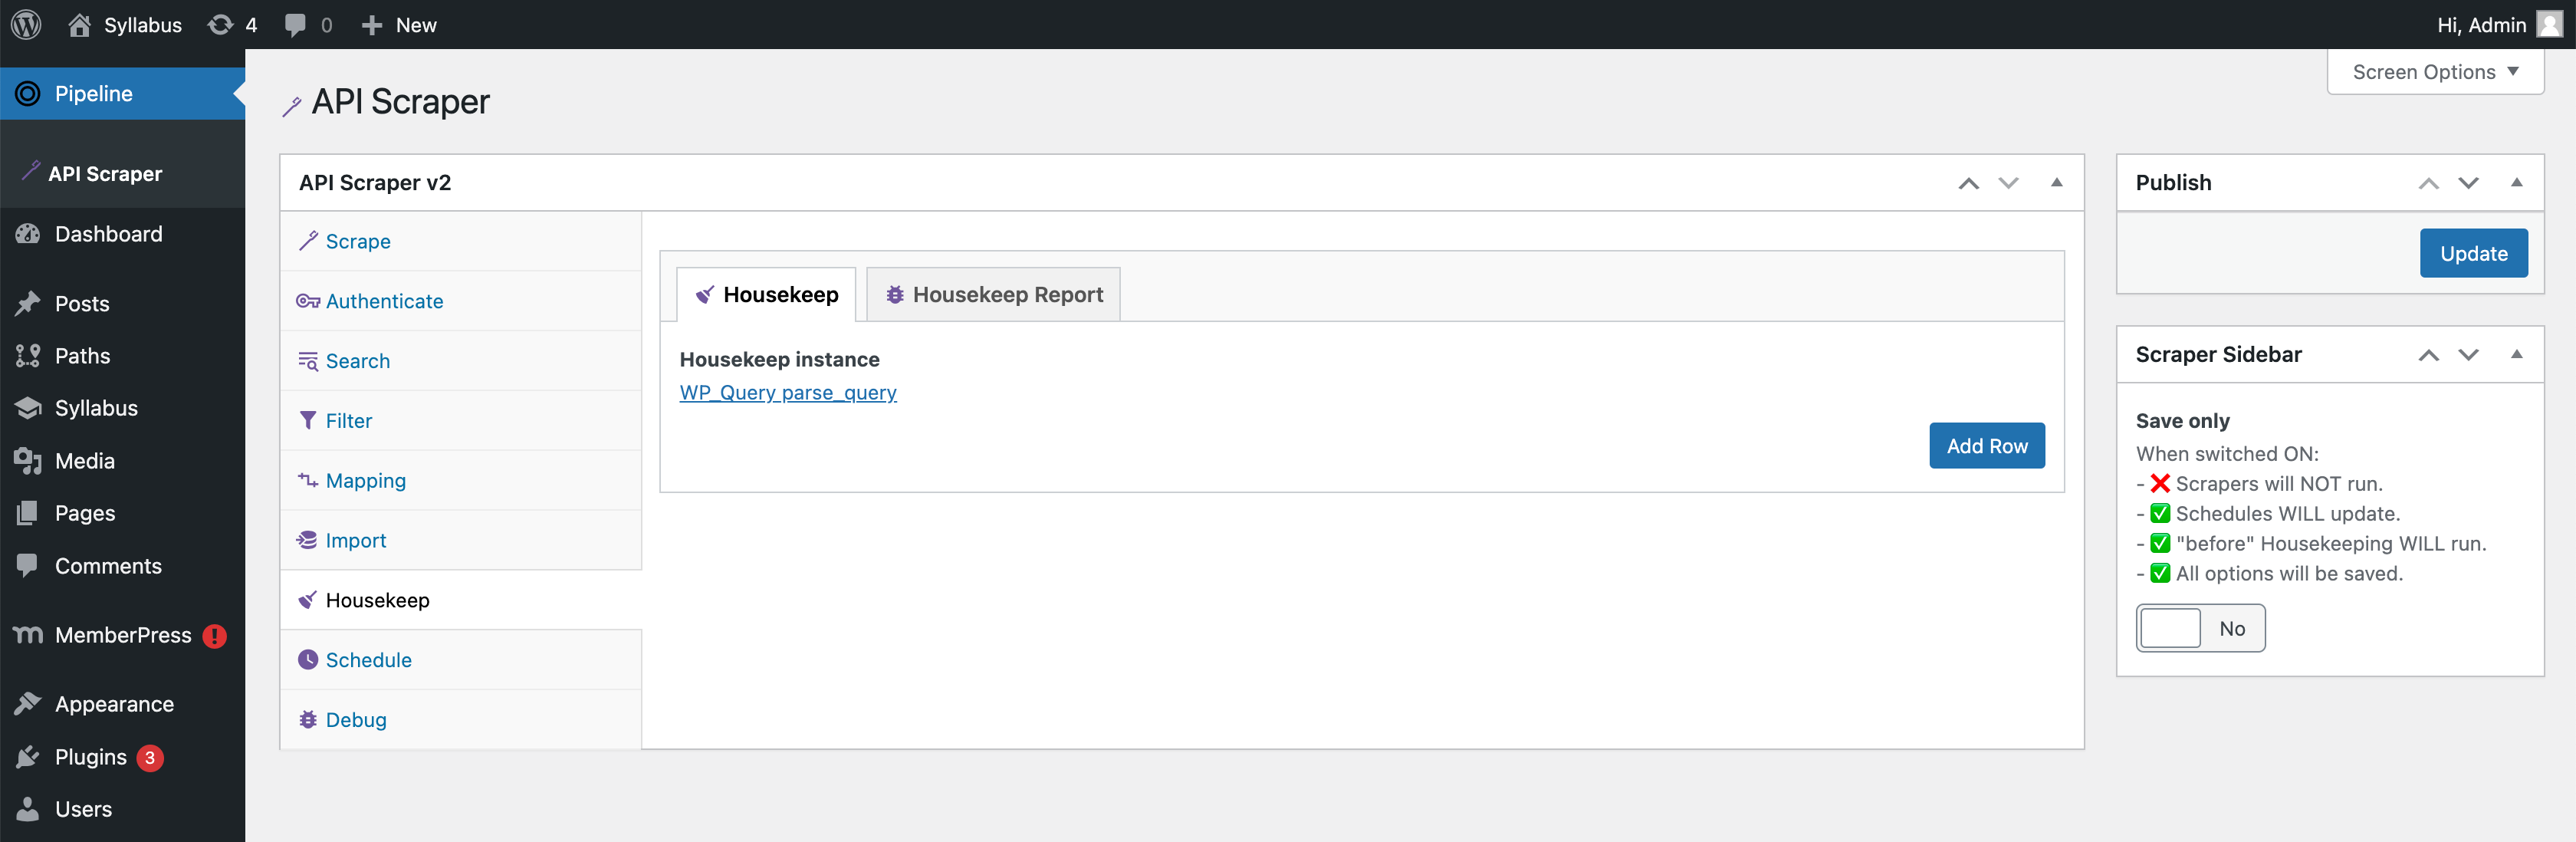
4.7. Housekeep
Everything is running smoothly and you're generating content. However, you're not removing any old posts or data you don't want anymore. The housekeeping tab allows you to manage this.
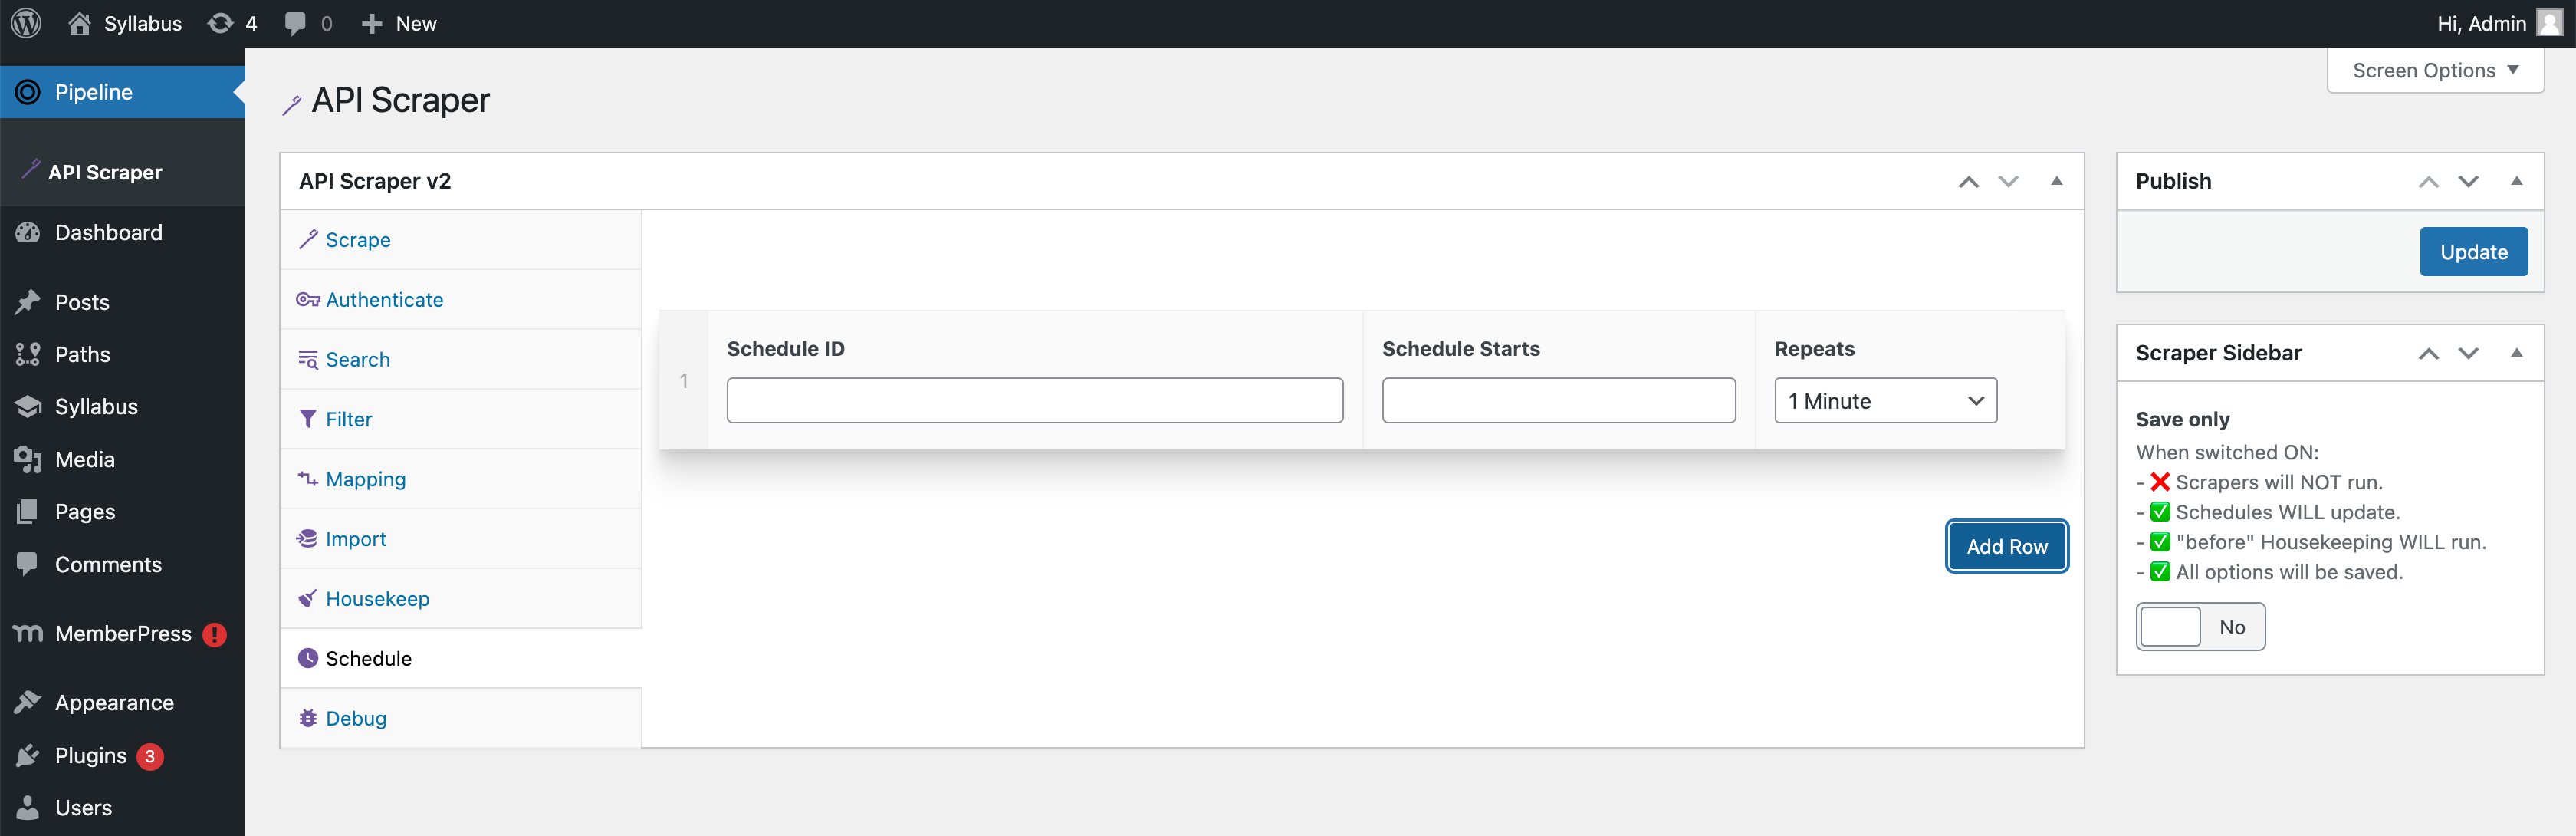
4.8. Schedule
Once everything is ready to go you can put it on a scheduled timer. Now you'll be getting your up-to-date scrape data without you having to manually run it.
5. Customising
Please refer to the Wiki
6. Testing
This plugin has PHPUnit tests built in. These are all located in the /tests folder. The config file is in the root of the plugin phpunit.xml.dist.
You also have a demo dashboard in the /files/ folder that can be used to show example data.
7. Contributing
Contributions are what make the open source community such an amazing place to learn, inspire, and create. Any contributions you make are greatly appreciated.
If you have a suggestion that would make this better, please fork the repo and create a pull request. You can also simply open an issue. Don't forget to give the project a star! Thanks again!
- Fork the Project
- Create your Feature Branch (git checkout -b feature/AmazingFeature)
- Commit your Changes (git commit -m 'Add some AmazingFeature')
- Push to the Branch (git push origin feature/AmazingFeature)
- Open a Pull Request
8. License
Distributed under the MIT License.
MIT License
Copyright (c) 2022 Andy Pearson
Permission is hereby granted, free of charge, to any person obtaining a copy of this software and associated documentation files (the "Software"), to deal in the Software without restriction, including without limitation the rights to use, copy, modify, merge, publish, distribute, sublicense, and/or sell copies of the Software, and to permit persons to whom the Software is furnished to do so, subject to the following conditions:
The above copyright notice and this permission notice shall be included in all copies or substantial portions of the Software.
THE SOFTWARE IS PROVIDED "AS IS", WITHOUT WARRANTY OF ANY KIND, EXPRESS OR IMPLIED, INCLUDING BUT NOT LIMITED TO THE WARRANTIES OF MERCHANTABILITY, FITNESS FOR A PARTICULAR PURPOSE AND NONINFRINGEMENT. IN NO EVENT SHALL THE AUTHORS OR COPYRIGHT HOLDERS BE LIABLE FOR ANY CLAIM, DAMAGES OR OTHER LIABILITY, WHETHER IN AN ACTION OF CONTRACT, TORT OR OTHERWISE, ARISING FROM, OUT OF OR IN CONNECTION WITH THE SOFTWARE OR THE USE OR OTHER DEALINGS IN THE SOFTWARE.
9. Contact
Author Link: https://github.com/IORoot
10. Changelog
- v1.0.0 - Initial Commit