

Pipeline : Exporter
Output results of the pipeline project to 3rd party services. Google-my-business and Youtube. Part of the Pipeline Project.
1. Table of Contents
- 3.1. Built With
- 3.2. A note about the creative-studio integration.
- 3.3. Installation
- 3.4. Steps before activating AUTH plugins
- 3.5. Check
- 3.6. Google My Business
- 3.7. OAUTH Keys
- 5.1. Google My Business
- 5.1.1. Call-To-Action
- 5.1.2. Events
- 5.2. YouTube
- 5.3. Creator Studio
- 5.4. Trello
- 5.5. REST Endpoints
- 5.1. Google My Business
- 7.1. OAUTH Issues
2. The Pipeline Project
The pipeline project was one where I wanted to be able to do the following:
- Query YouTube / Instagram for specific videos and download the results (video file, post content, meta, etc).
- Automatically create some cover art.
- Combine the videos to create a quick trailer.
- Export the results to my social media.
This then became the components of the pipeline project:
3. About The Project
The pipeline project was built to automatically build, process and export generated posts. This plugin is that last part of the process. The exporter connects with various endpoints and APIs to send those generated posts to.
Originally I wanted all social media, but eventually whittled it down to YouTube, Google-My-Business, Trello, Creator Studio and REST Endpoints.
3.1. Built With
This project was built with the following frameworks, technologies and software.
You will need the following extra plugins to work:
- HTTPS Must be working on the site / vagrant
- ACF Pro
- https://github.com/IORoot/wp-plugin__oauth--YouTube
- https://github.com/IORoot/wp-plugin__oauth--GMB
- https://github.com/IORoot/wp-plugin__acf--inline-datetime-field
These plugins will allow you to do an OAUTH connection to the specific service. They are ACF buttons that will complete the hand-shake with the google APIs. These need to be configured and running (with a client_secret.json created) for the authentication to work.
(optional) The following plugin will make the code boxes look better.
3.2. A note about the creative-studio integration.
This is purely a test interface to my other project https://github.com/IORoot/docker__puppeteer--facebook. That project is a docker container that hosts a webserver to a puppeteer script. That script will navigate to creator-studio and attempt to post your video or image to Facebook and Instagram. I created this to circumvent the lack of API to those services.
This plugin has an authentication and exporter method for that service, but you'll have to host that yourself. You can build the container and host it at a particular IP address. The authentication in this plugin will export to that address.
3.3. Installation
This was built with ACF PRO - Please make sure it is installed before installing this plugin.
These are the steps to get up and running with this plugin.
- Clone the repo into your wordpress plugin foldergit clone https://github.com/IORoot/wp-plugin__pipeline--exporter ./wp-content/plugins/pipeline-exporter
- Activate the plugin.
3.4. Steps before activating AUTH plugins
- Make sure you do a composer install or composer update in each before activating
- Also, make sure the client_secret.json file is placed in the root of each OAUTH plugin. (See below)
There is a .gitignore on the file client_secret.json, so you don't commit it to a repo by accident.
3.5. Check
If the auth plugins are working, you will see a new 'LOGIN WITH YOUTUBE' button on authentication tab on the exporter plugin for youtube.
3.6. Google My Business
Is one of the only client-libraries that is NOT part of the standard google/apiclient-services, so you have to download it yourself. You can get it here: https://developers.google.com/my-business/samples/previousVersions
Place it into the /GMB folder.
3.7. OAUTH Keys
Head over the the google console https://console.cloud.google.com/ and create a project with the following APIs:
- YouTube Data API v3
- Google My Business
The google my business API is a private one and you need to request access from google for it.
Create an OAUTH 2.0 client ID and download the client_secret.json file: place it into the root of the plugin.
4. Usage
This usage documentation is split between the main plugin and the exporters. This is because there are multiple exporters, each with their own interface which work differently. Therefore, see that section to find out how they work.
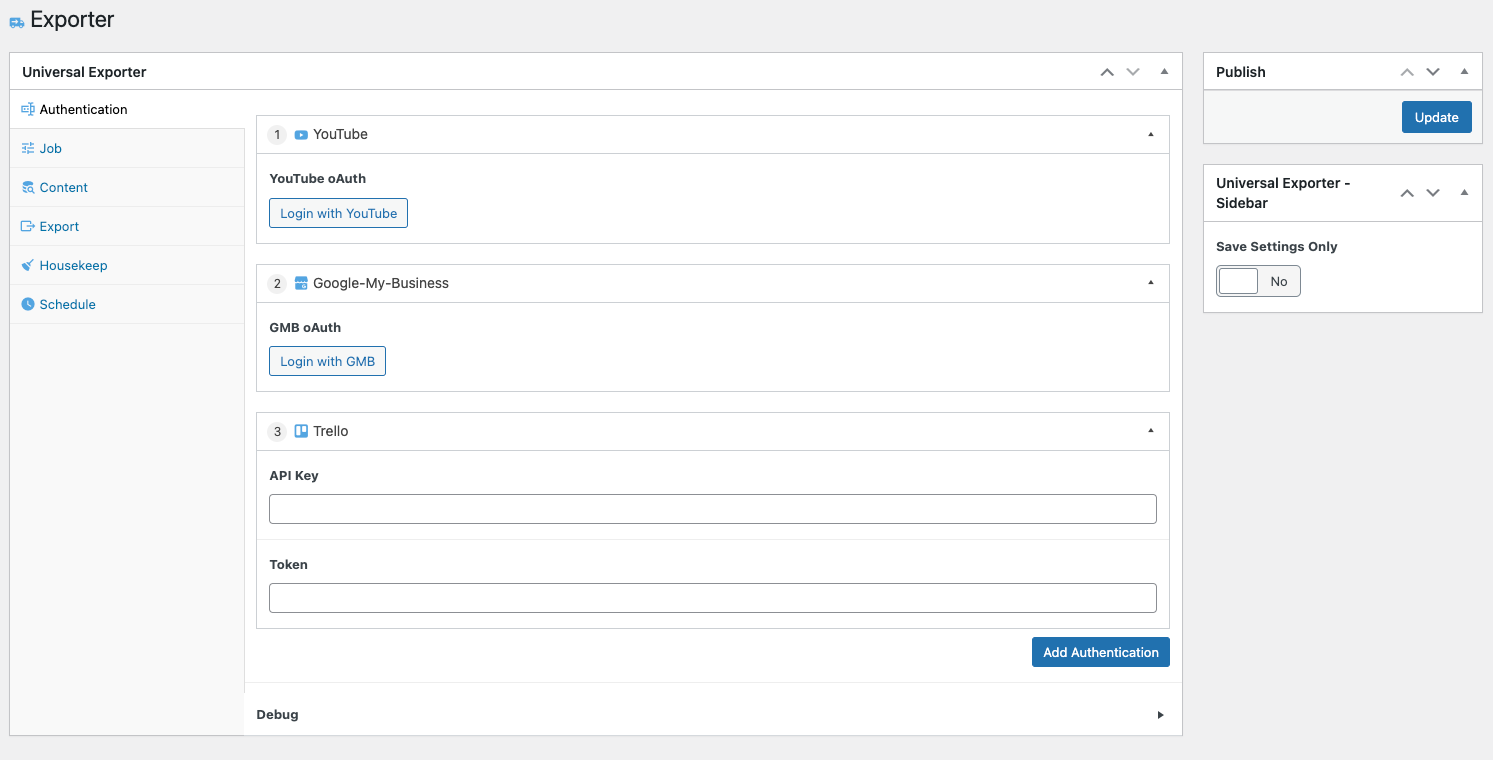
4.1. Authentication
The authentication tab connects the plugin to the third-party services. There are currently four different methods:
- YouTube. Uses the ACF OAUTH Button for youtube.
- Google-My-Business. Uses the OAUTH Button for GMB.
- Trello. This requires:
- API Key. A valid API key obtained from trello.
- Token. A valid token obtained from trello.
- IG-Scheduler. This connects to the https://github.com/IORoot/docker__puppeteer--facebook project hosted in a docker container. It needs:
- Username. Facebook CreatorStudio account with a linked Instagram account.
- Password. Facebook password for creator studio.
- API Key. Set in the auth.json file in the https://github.com/IORoot/docker__puppeteer--facebook project.
- IP Address. Where the container is being hosted and the express.js webserver is being run.
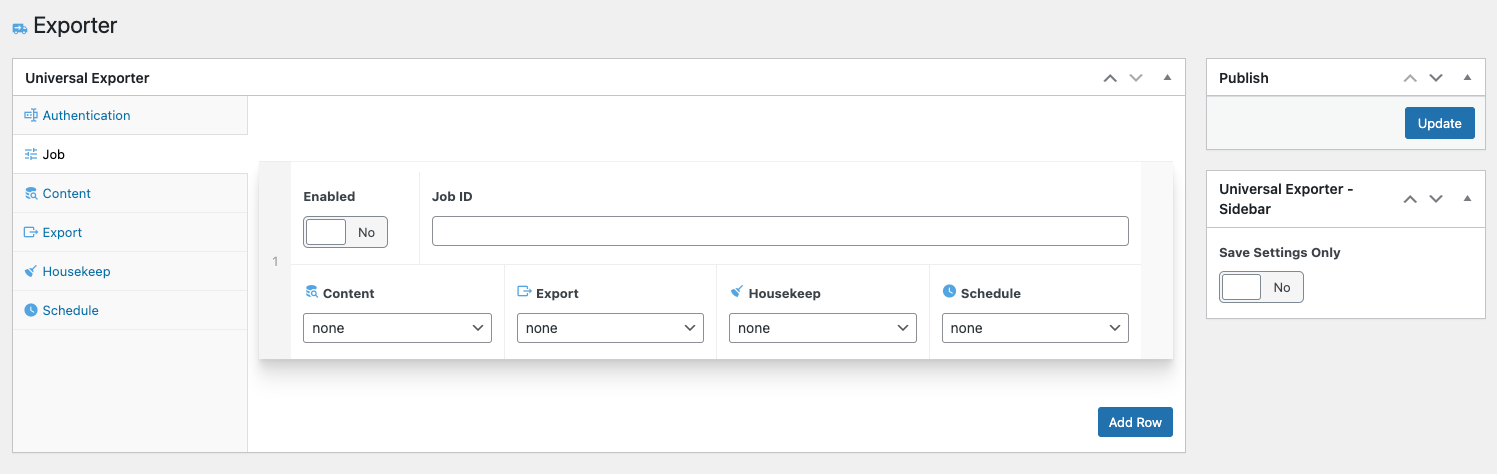
4.2. Job
A job allows you to select variations of settings to run.
- Enabled. Turn on or off.
- Job ID. Identifier to destinguish between jobs.
- Content. Pick which content to use for this job.
- Export. Pick which export method to use for this job.
- Housekeep. Pick which housekeep method to use for this job.
- Schedule. Pick which schedule to use for this job.
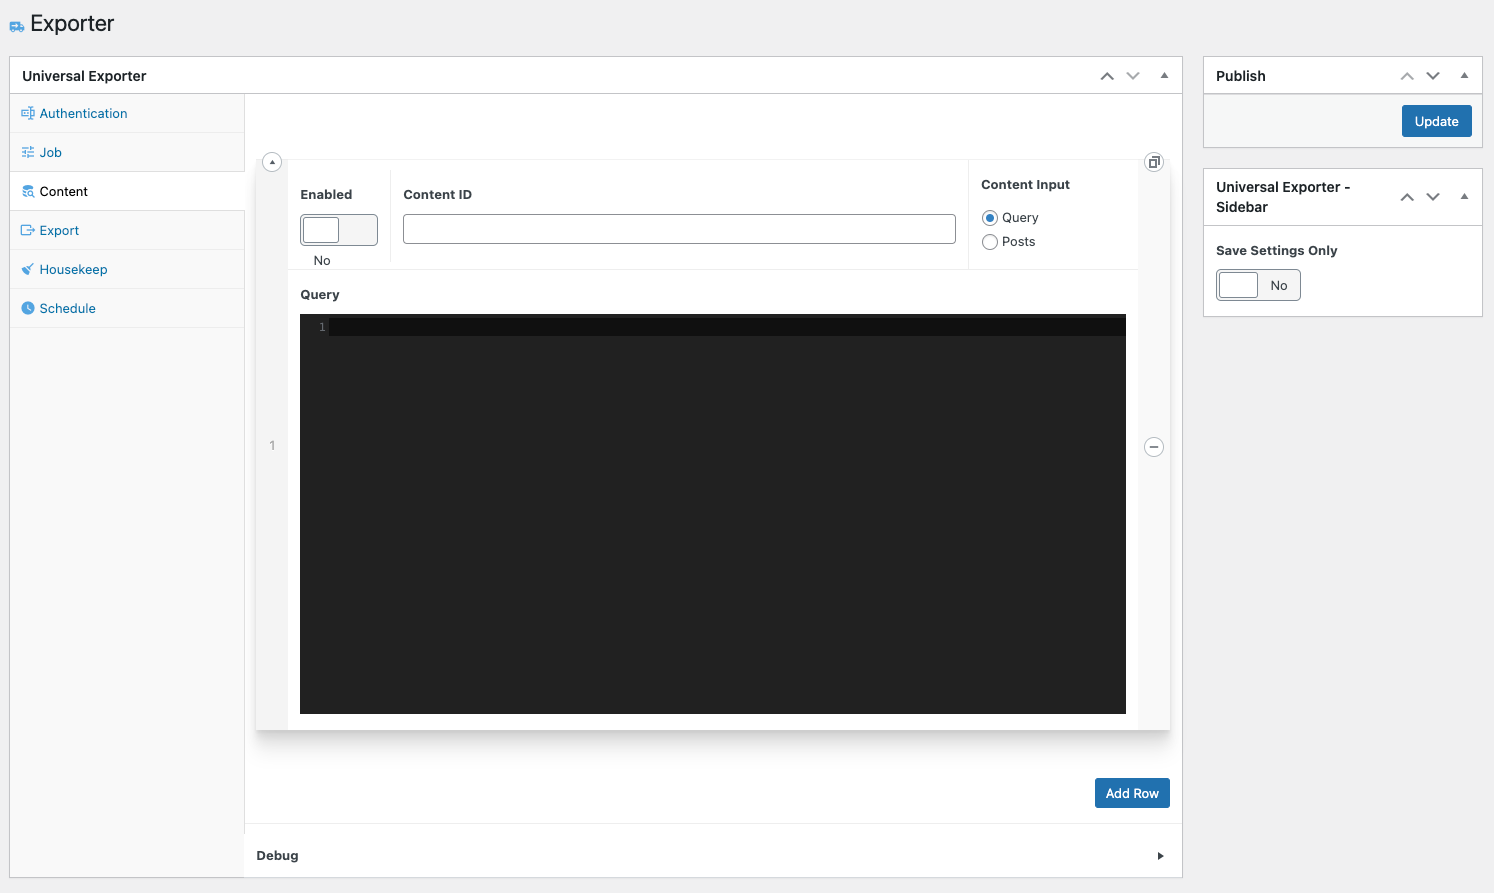
4.3. Content
The content is the body of the post you are going to use when exporting. This will be the text in your video or image post.
- Enabled. List this as an option to use in 'jobs'. Turn on or off.
- Content ID. The identifier to use when listed in the 'jobs' tab.
- Content Input.
- Query. Use a WP_QUERY array to select which posts to export.
- Posts. Manually select which posts to export.
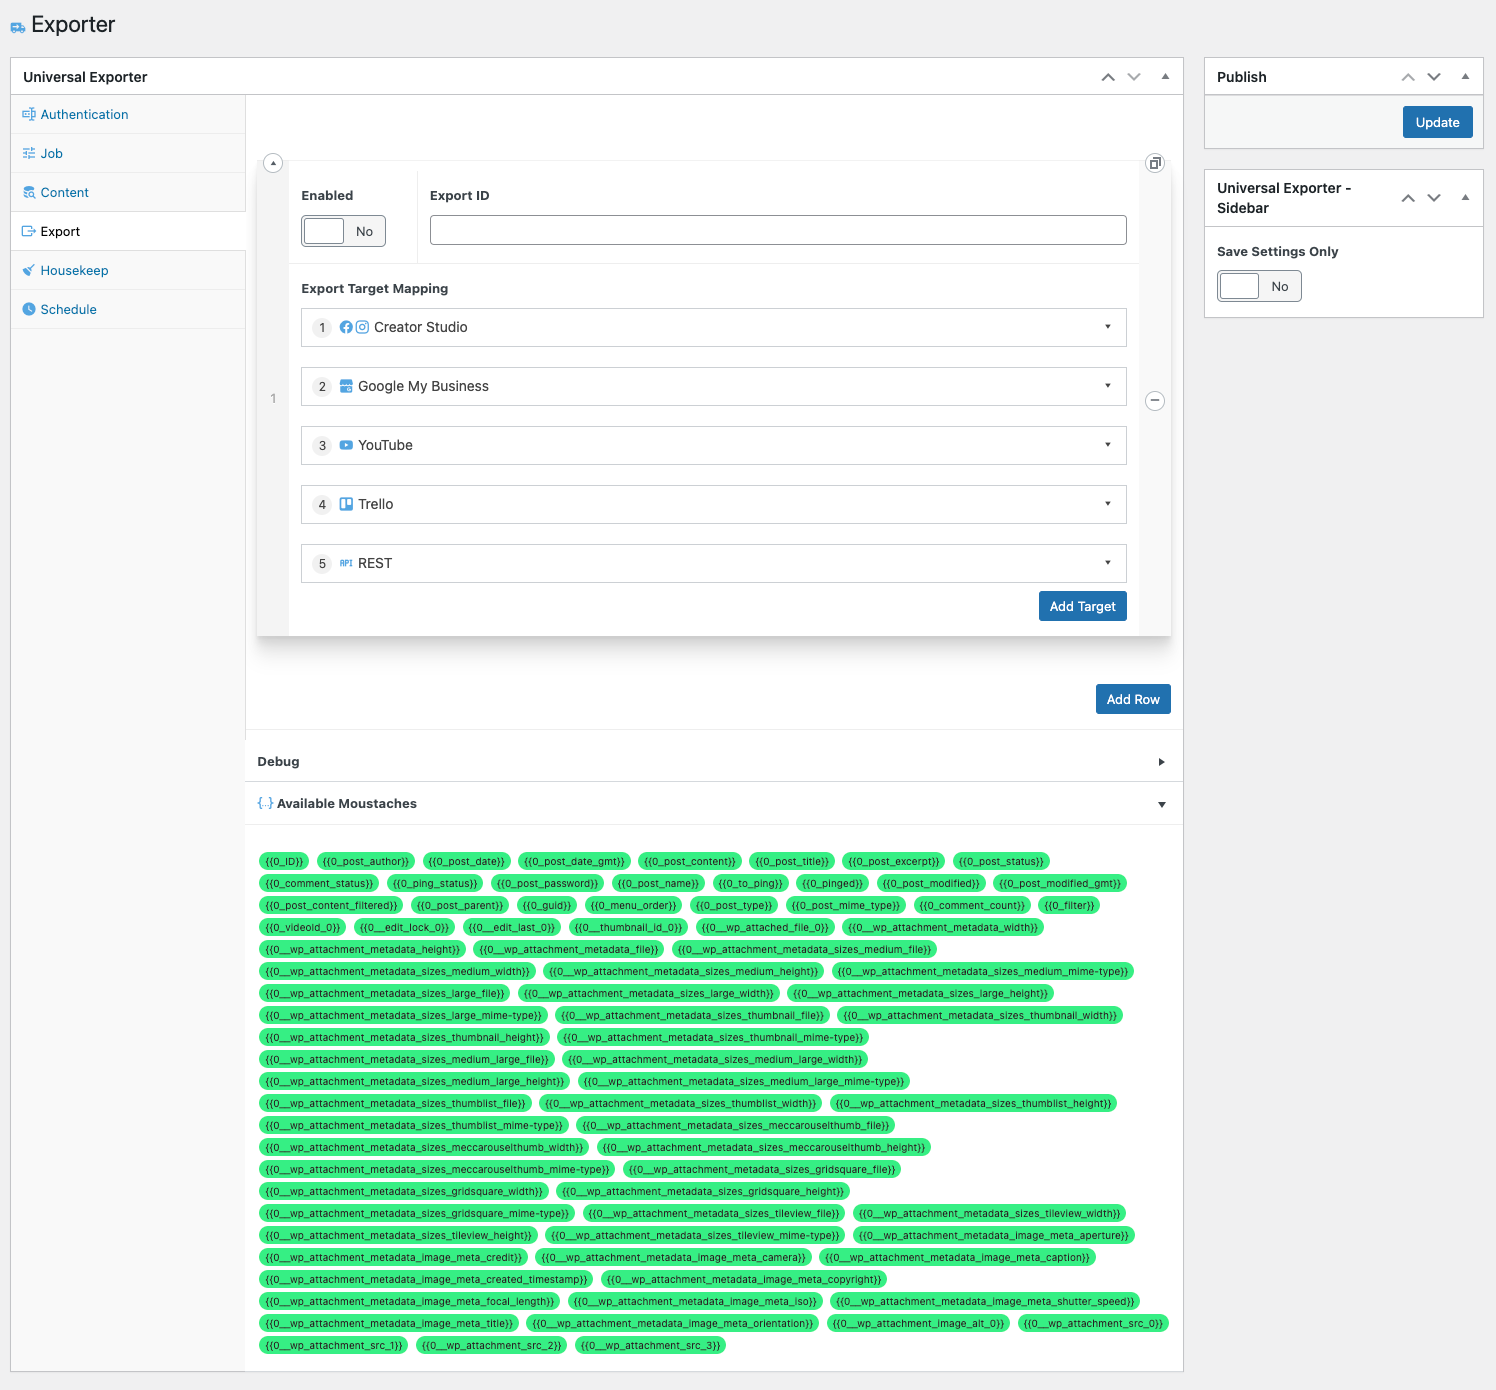
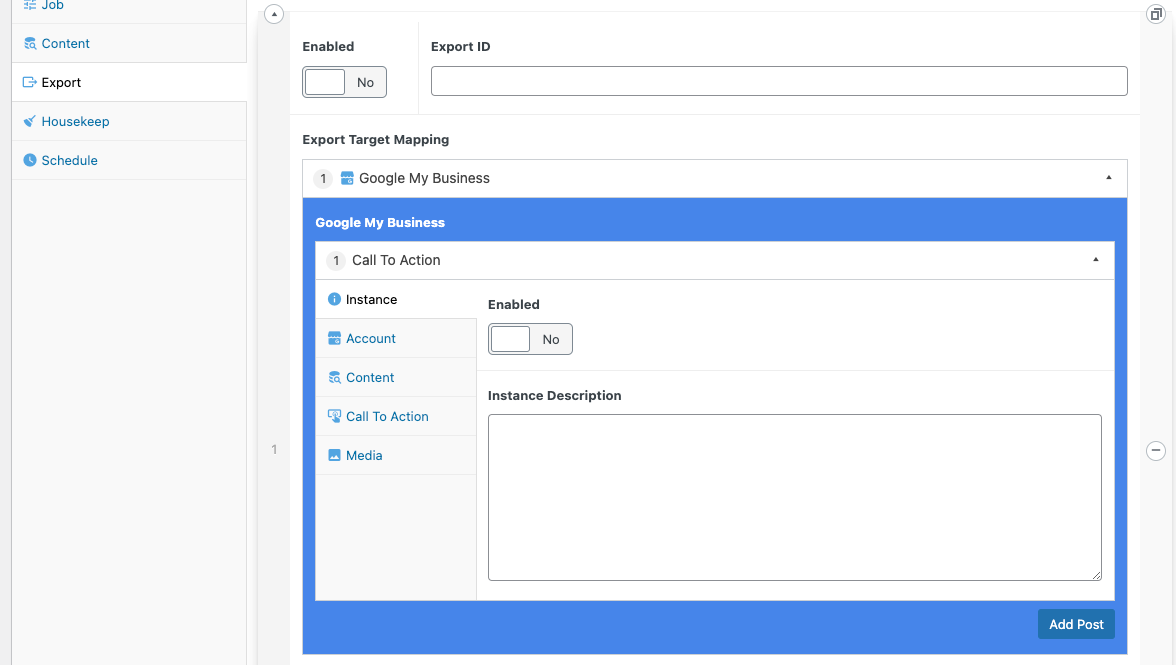
4.4. Export
This is where you configure the specific exporters to use and the targets. Please see the next section for a description of each exporter.
Enabled. List in the 'jobs' tab or not.
Export ID. The name of the export instance to list in the 'jobs' tab.
Export Target Mapping. Add multiple targets:
- Google My Business
- YouTube
- Trello
- REST
- Creator Studio
Available Moustaches. These are special variables you can use in the textboxes and textareas on the exporters. For instance, you could use {{0_post_name}} in the Title field of your youtube exporter and it will substitute the first (0) post's post_name into the title.
Note that since the query will return an array, the variable name will have a prefix of the index. {{0_post_name}}, {{1_post_name}}, {{2_post_name}} ... The meta-fields have a prefix with double underscores since they, themselves, are arrays.
4.5. Housekeep
One the exporters have run, you might want to remove posts from the system so they don't get exported again. The housekeeping tab allows you to do that.
- Enabled. List in the 'jobs' tab or not.
- Housekeep ID. The name of the housekeeping instance to list in the 'jobs' tab.
- Housekeep Action. What to do with the posts that are returned from the query.
- Bin Posts. Soft delete - can be recovered in the trash.
- Delete Posts. Hard delete - cannot be recovered.
- Bin Posts & Images. Soft delete - can be recovered in the trash.
- Delete Posts & Images. Hard delete - cannot be recovered.
- Housekeep Query. A WP_Query array to query the database of posts. these posts then have the 'action' performed on them.

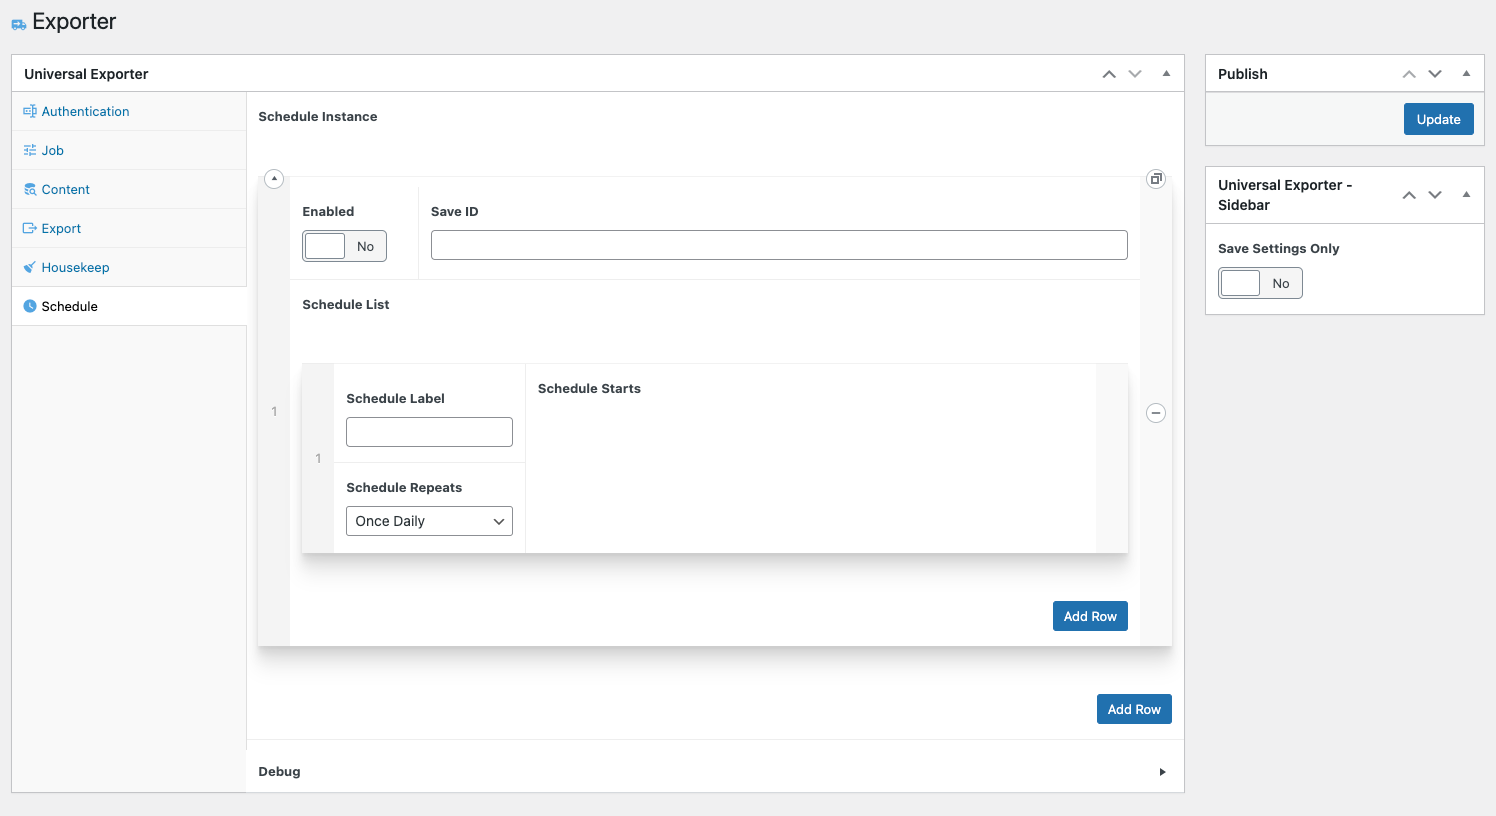
4.6. Schedule
- Enabled. List in the 'jobs' tab or not.
- Save ID. The name of the scheduled instance to list in the 'jobs' tab.
- Schedule List (row)
- Schedule Label. Identifier.
- Schedule Repeats. How often you want this schedule to repeat.
- Schedule Starts. When to start this particular schedule. Note that the ACF https://github.com/IORoot/wp-plugin__acf--inline-datetime-field plugin needs to be installed for this.
5. Exporters
5.1. Google My Business
5.1.1. Call-To-Action
Instance
Enabled. Run this exporter or not.
Instance Description. Any extra notesfor yourself to remember about this exporter. What it does, where it goes, etc...
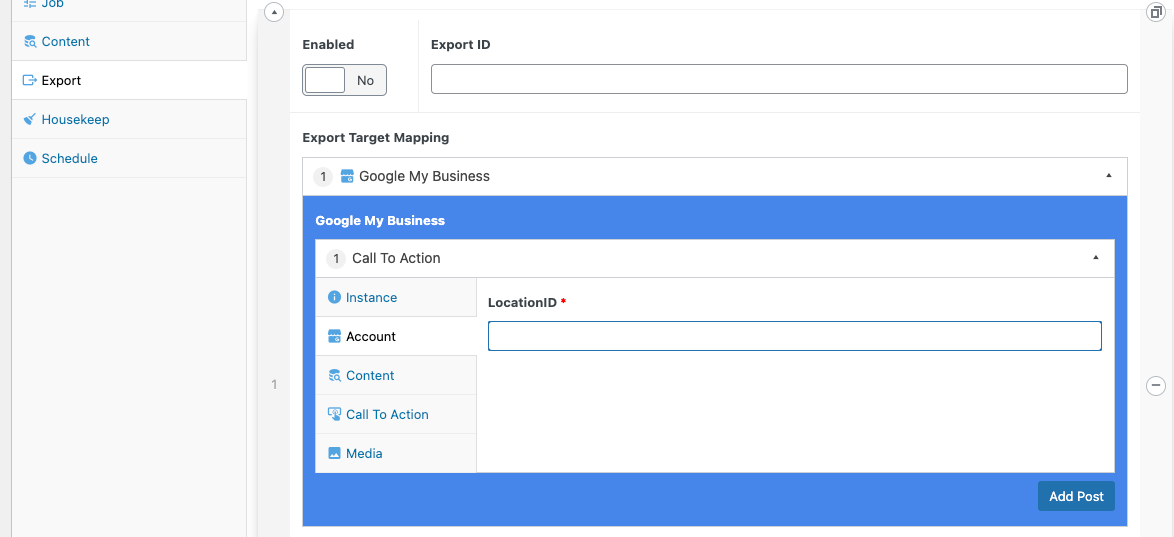
Account
- LocationID. As per the Google-My-Business API, https://developers.google.com/my-business/ref_overview you'll need to query the API to get your locationID.
It should be in the format:
accounts/{accountID}/locations/{locationID}e.g.accounts/1234567890123455678901/locations/12345678901234567890
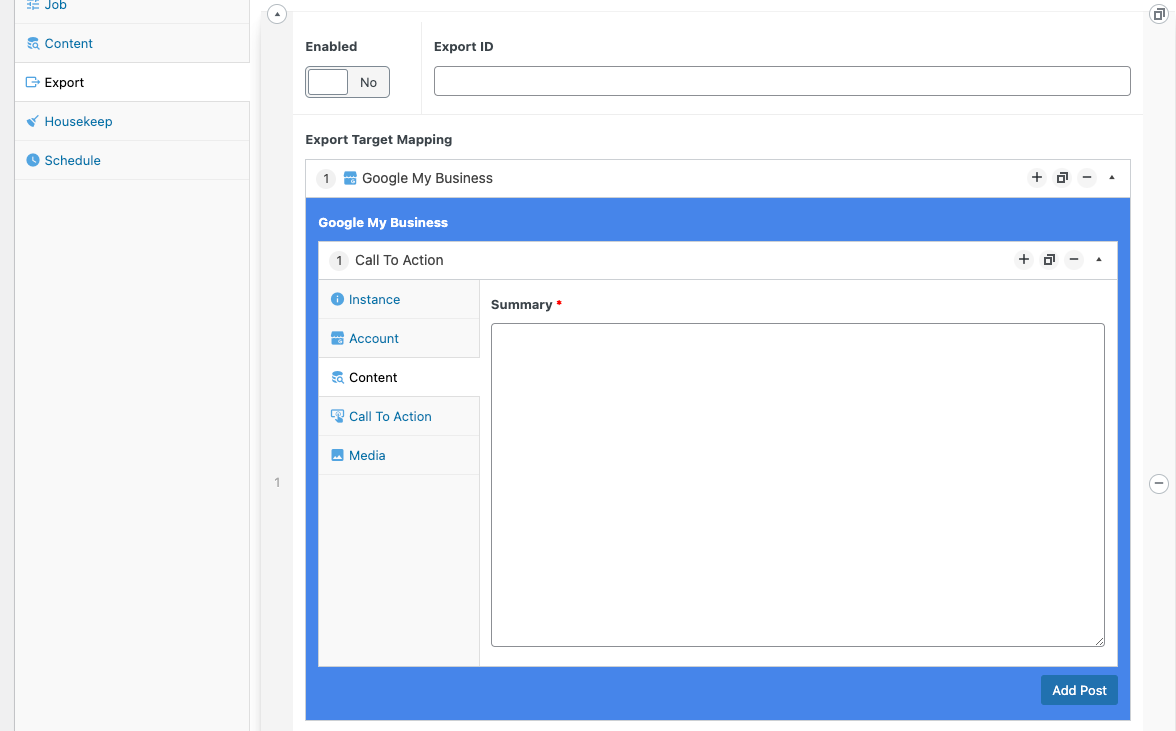
Content
- Summary. The text to be the main body of the post. You can use any of the available {{moustache}} variables.
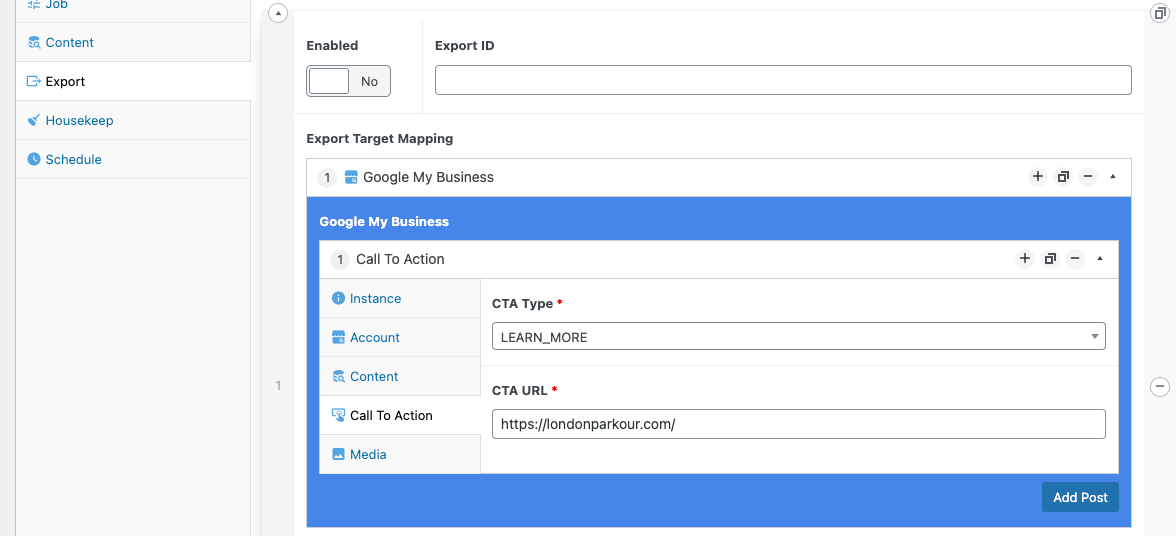
Call To Action
CTA Type. The type of button to use. This will determine the words used on the call-to-action button.
CTA URL. The URL to send the user if the button is pressed.
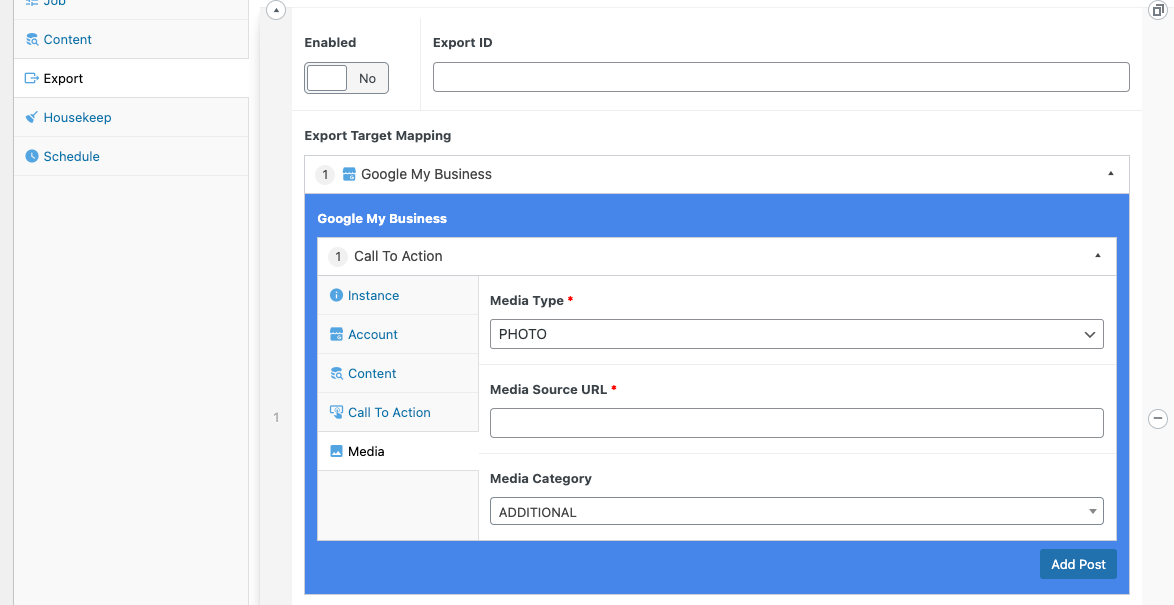
Media
Media Type. The available types of media (Photo / Video / etc) are listed here.
Media Source URL. Where the media is hosted so that it can be downloaded to be posted onto google-my-business. You can use any of the available {{moustache}} variables.
Media Category. When the media is being uploaded to google my business, pick which category to file it under.
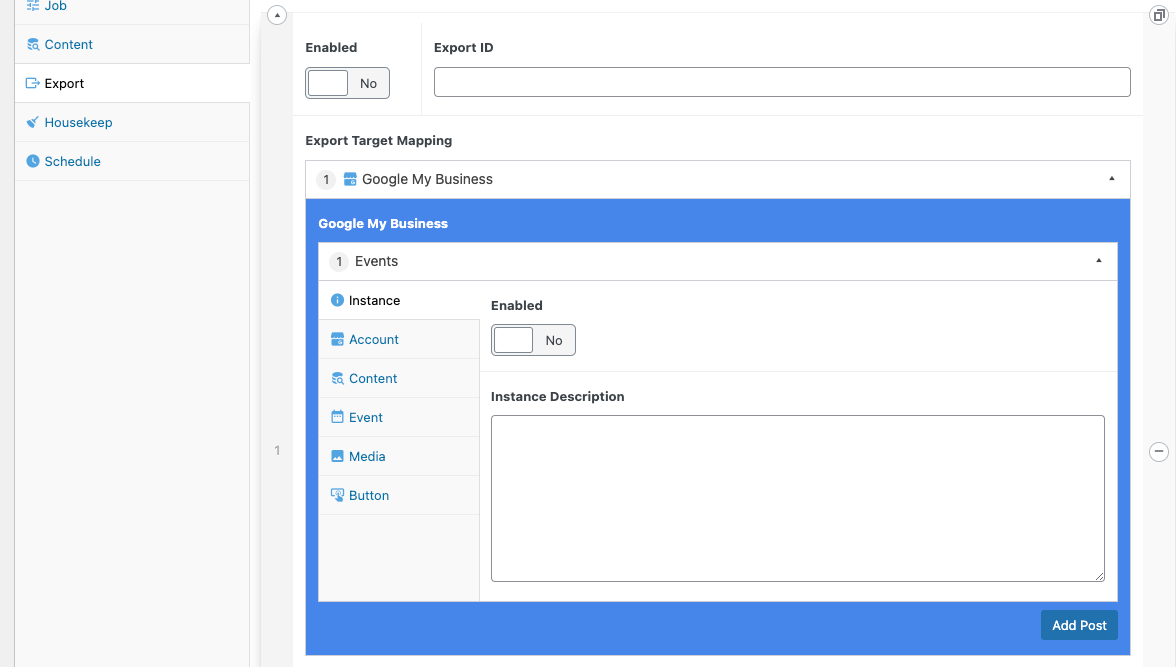
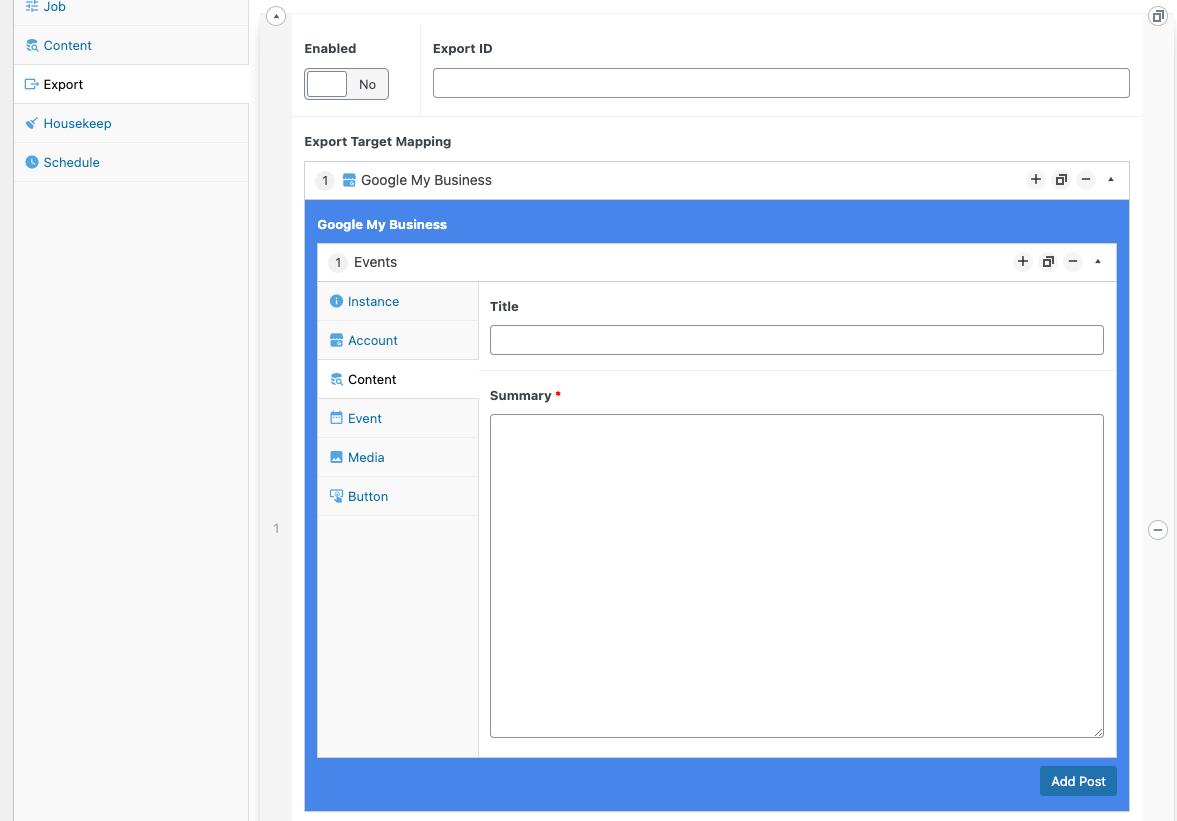
5.1.2. Events
Instance
Enabled. Run this exporter or not.
Instance Description. Any extra notesfor yourself to remember about this exporter. What it does, where it goes, etc...
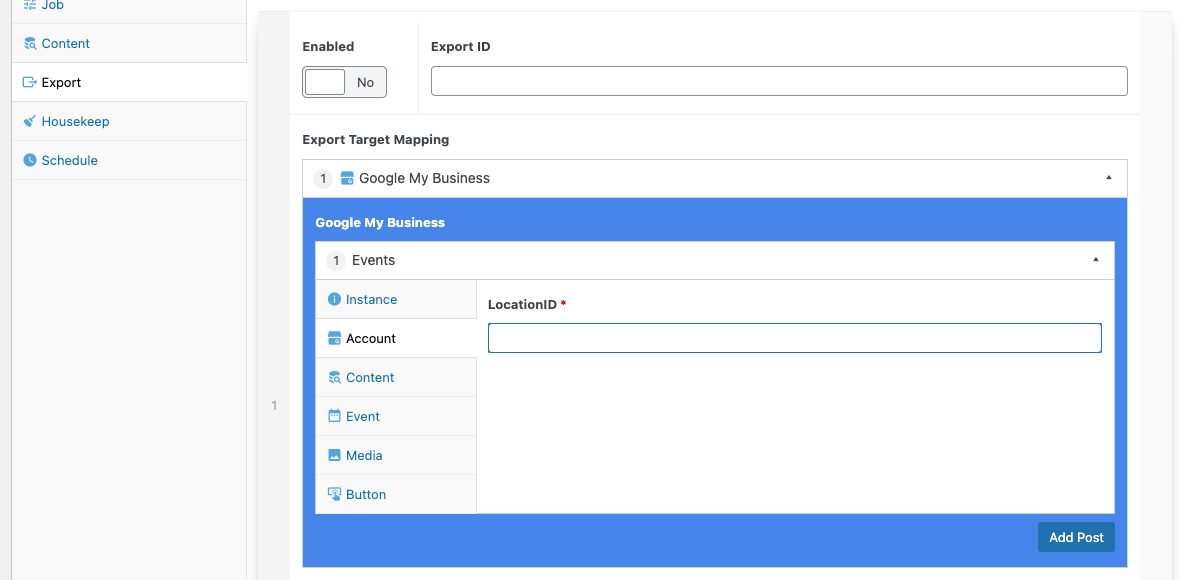
Account
- LocationID. As per the Google-My-Business API, https://developers.google.com/my-business/ref_overview you'll need to query the API to get your locationID.
It should be in the format:
accounts/{accountID}/locations/{locationID}e.g.accounts/1234567890123455678901/locations/12345678901234567890
Content
- Summary. The text to be the main body of the post. You can use any of the available {{moustache}} variables.
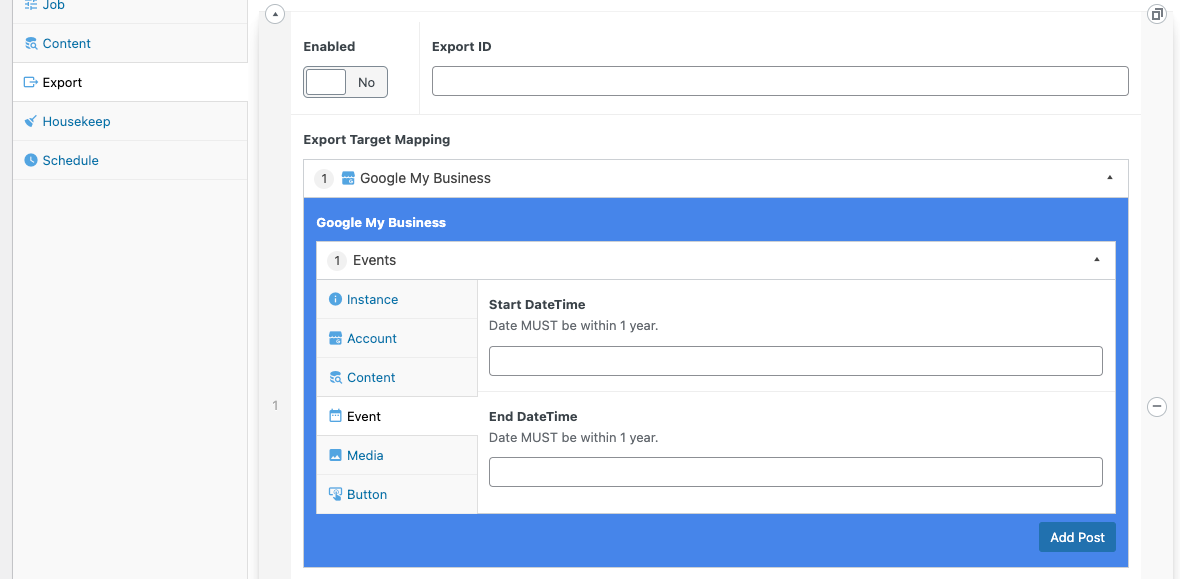
Event
Start DateTime. Pick when the event is starting.
End DateTime. Pick when the event is finishing.
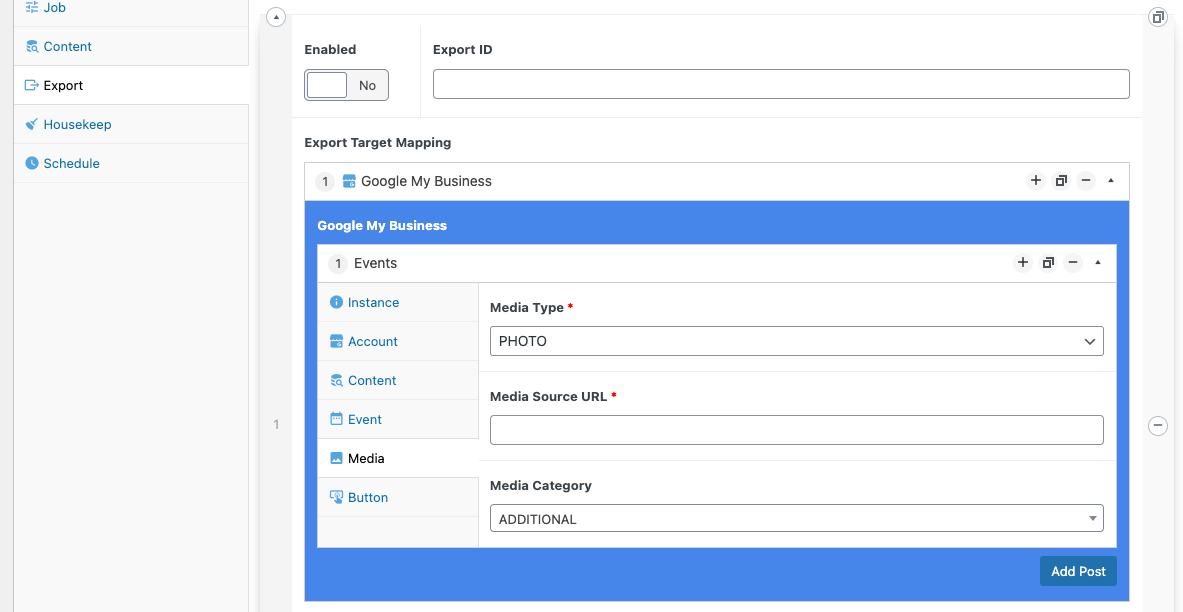
Media
Media Type. The available types of media (Photo / Video / etc) are listed here.
Media Source URL. Where the media is hosted so that it can be downloaded to be posted onto google-my-business.
Media Category. When the media is being uploaded to google my business, pick which category to file it under.
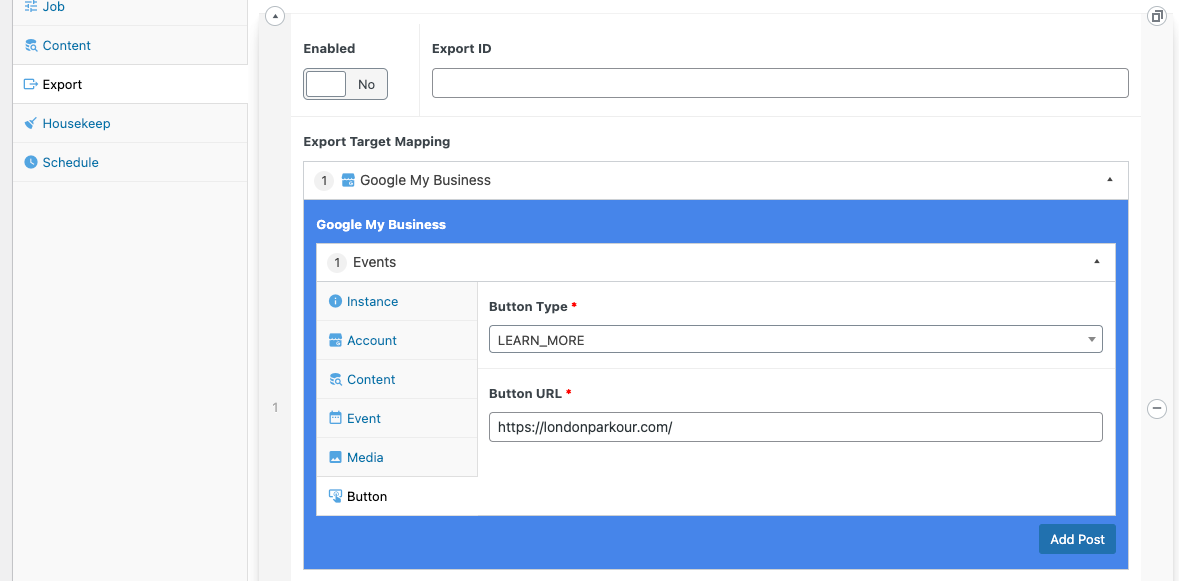
Button
Button Type. The type of button to use. This will determine the words used on the button.
Button URL. The URL to send the user if the button is pressed.
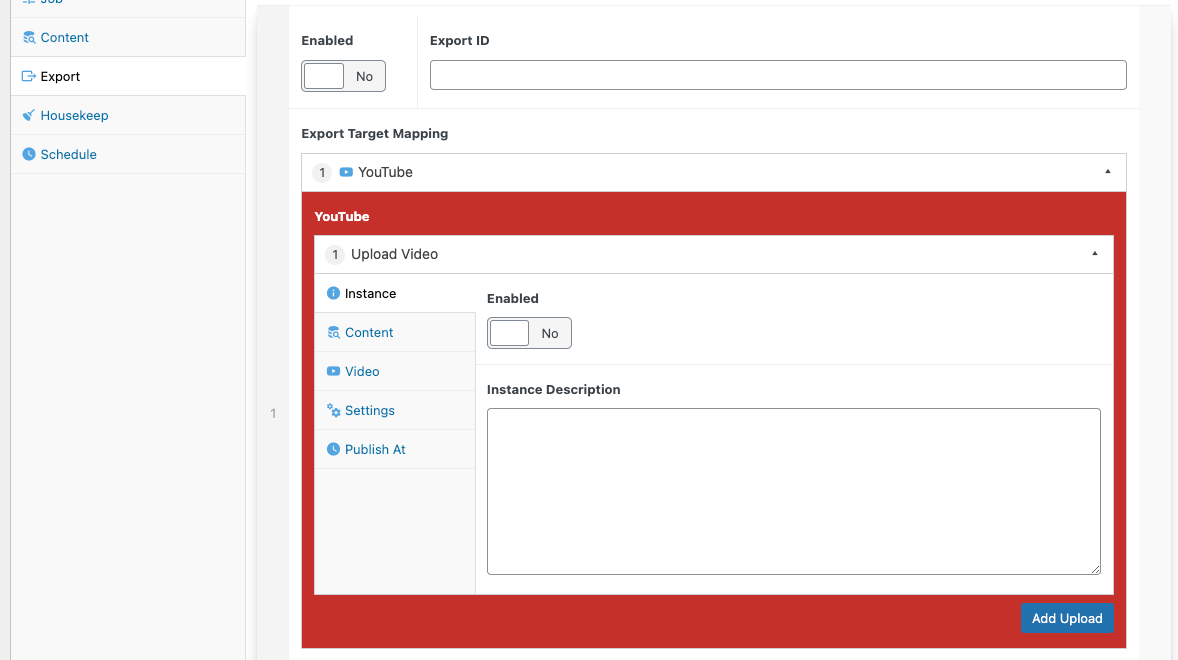
5.2. YouTube
Instance
Enabled. Run this exporter or not.
Instance Description. Any extra notes for yourself to remember about this exporter. What it does, where it goes, etc...
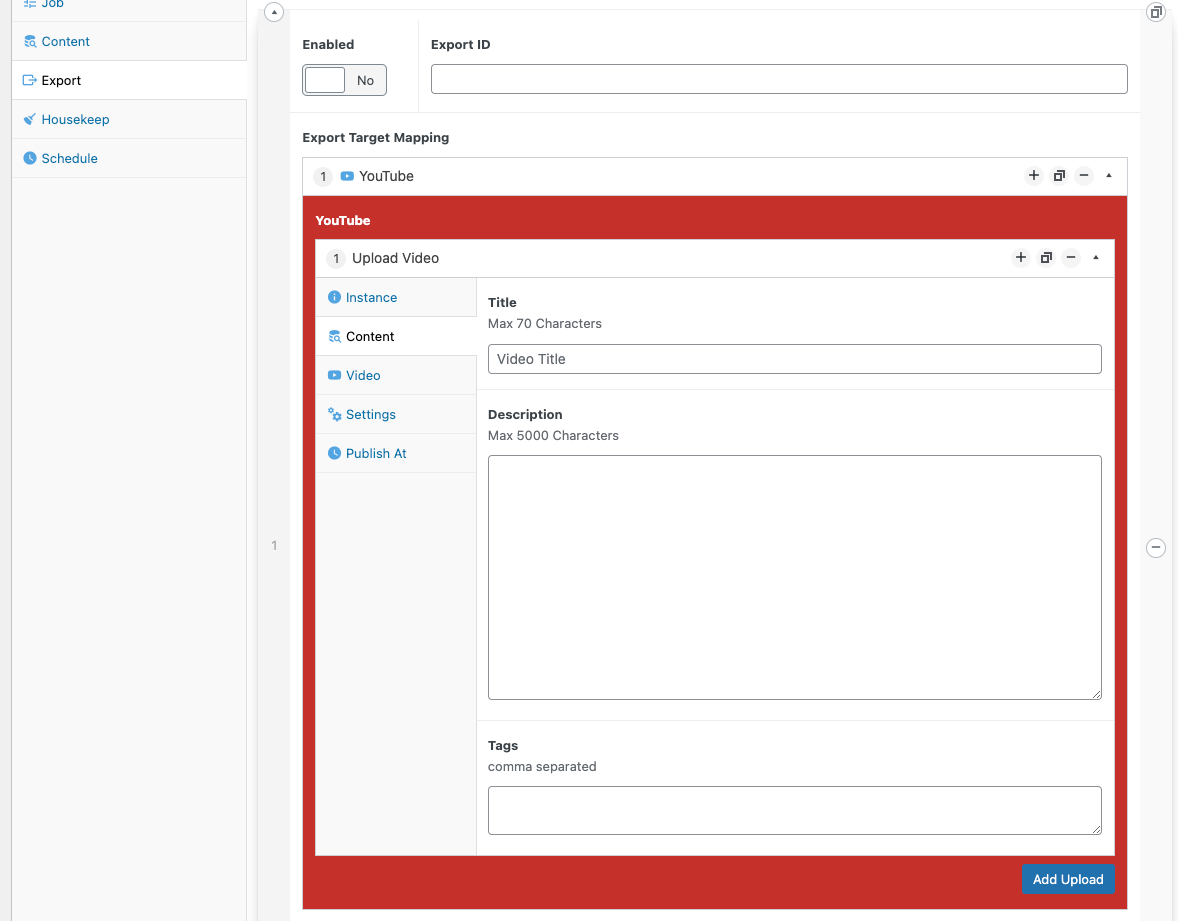
Content
Title. The title of the video being uploaded. You can use any of the available {{moustache}} variables.
Description. The video description being uploaded. You can use any of the available {{moustache}} variables.
Tags. A comma separated list of metatags to link to the video for searching.
Video
Video Path. The local path of when the video is. This will be uploaded to GMB. You can use any of the available {{moustache}} variables. Note: meta fields are arrays. {{video}} should be {{video_0}}.
Thumbnail Path. The local path of the thumbnail image of the video being uploaded. This will be uploaded to GMB. You can use any of the available {{moustache}} variables. Note: meta fields are arrays. {{path}} should be {{path_0}}

Settings
Embeddable. Set whether viewers can embed you video or not.
Category. Pick the video category on youtube.
Privacy Status. The default state of the video once uploaded.
License. Which license to associate with the video.

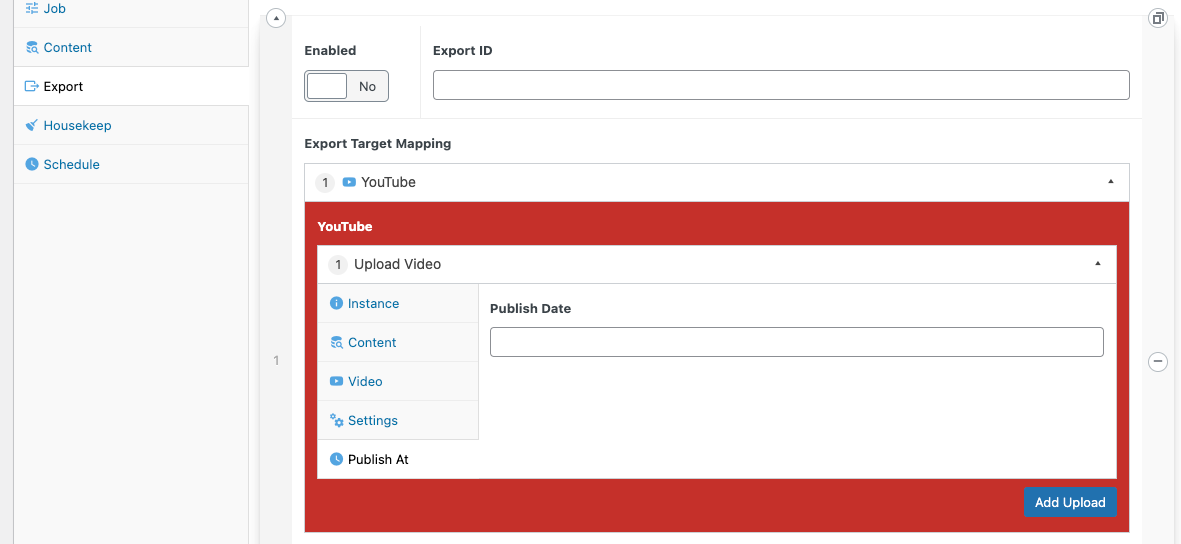
Published At
- Published At. Pick a future date for when the video will be published.
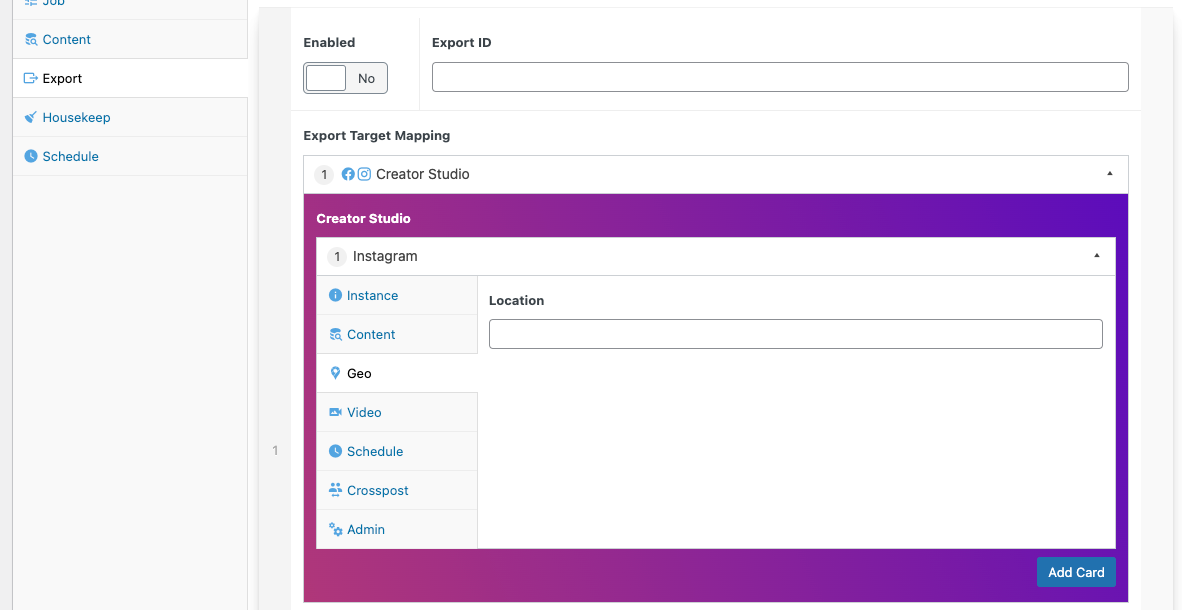
5.3. Creator Studio
The creator studio exporter will directly communicate with your own hosted docker image of the https://github.com/IORoot/docker__puppeteer--facebook project.
This is a puppeteer script with an express.js webserver controlling it. You can use the web interface to tell the puppeteer script how to work. The puppeteer script will login to Creator studio as you, create a new post, upload your video, schedule it and then post.
This exporter will connect to the express.js API and send the details required to kick off the puppeteer script.
Instance
Enabled. Run this exporter or not.
Instance Description. Any extra notesfor yourself to remember about this exporter. What it does, where it goes, etc...

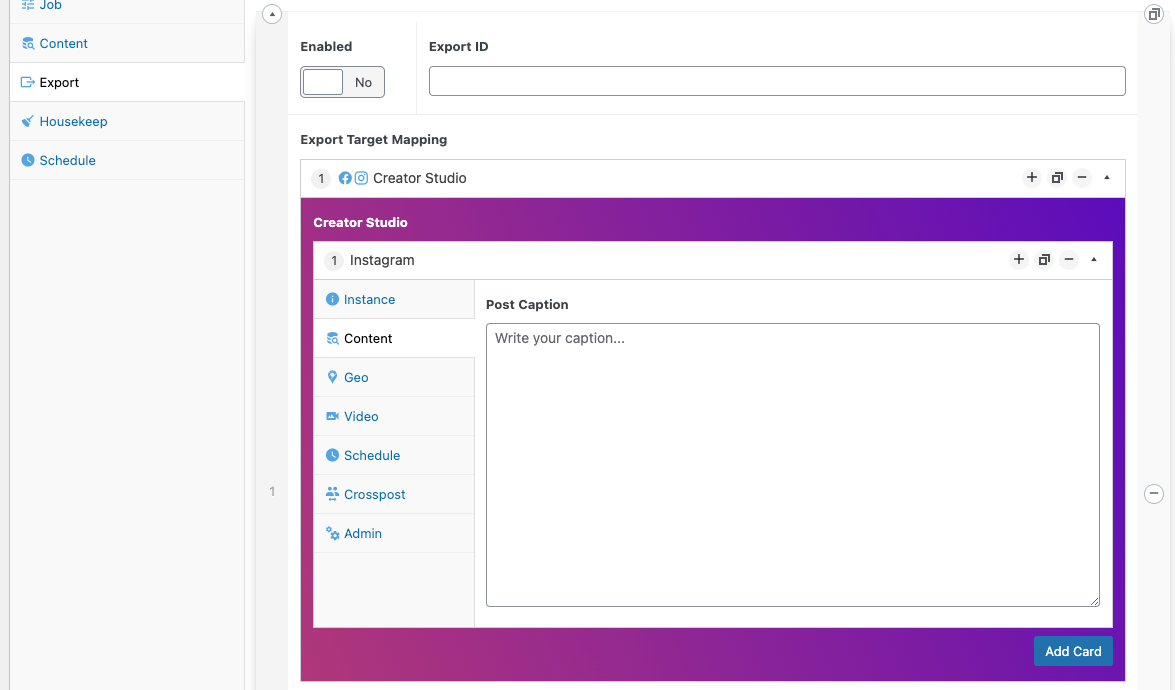
Content
- Post Caption. The main body of the post. You can use any of the available {{moustache}} variables.
Geo
- Location. Pick a world location. You can use any of the available {{moustache}} variables.
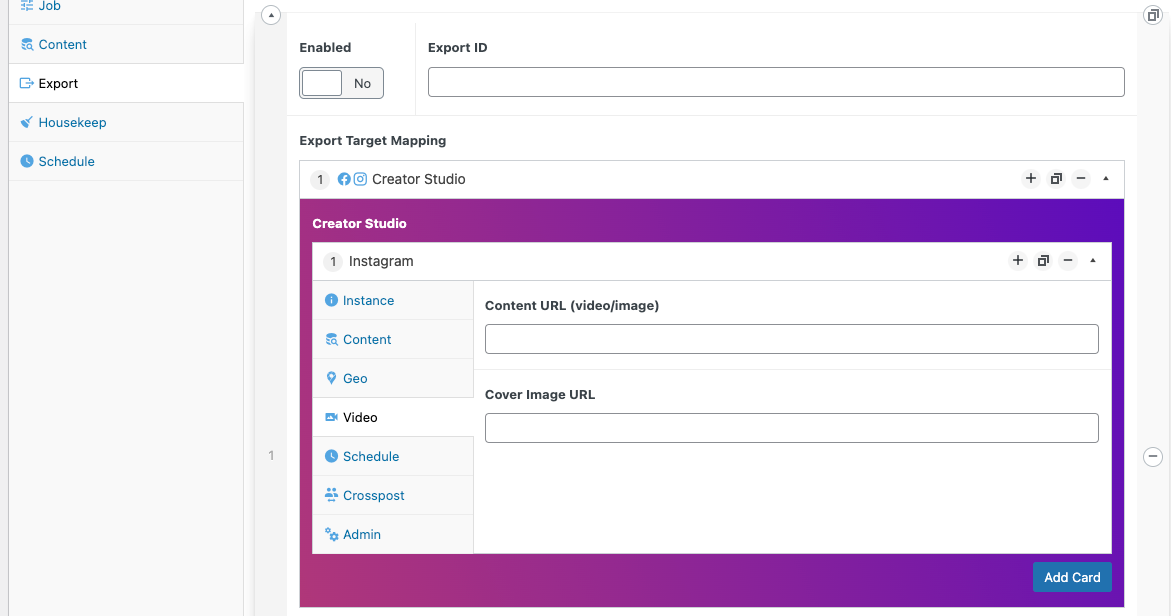
Video
Content URL. The URL of the video or image to download which will then be uploaded to creator studio. You can use any of the available {{moustache}} variables.
Content Image URL. The thumbnail URL for a video. You can use any of the available {{moustache}} variables.
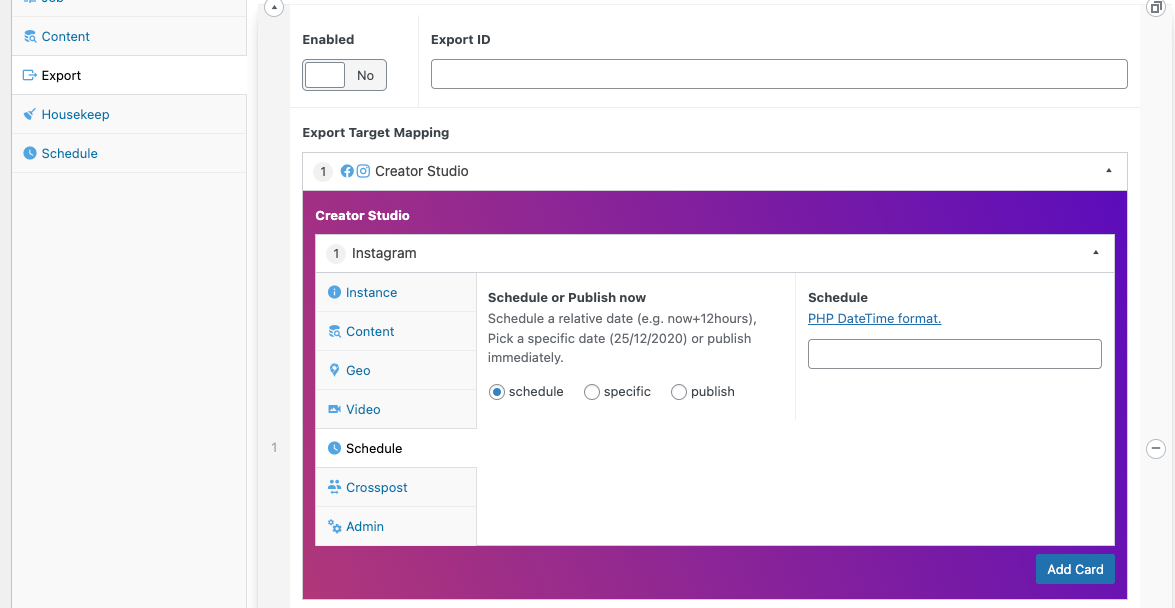
Schedule
Schedule. Using a PHP DateTime format, specify the relative date (+1 day, +2 weeks, +3600sec, etc...) of when to publish the post.
Specific. Pick a specific DateTime to publish.
Publish. Immediately publish now.
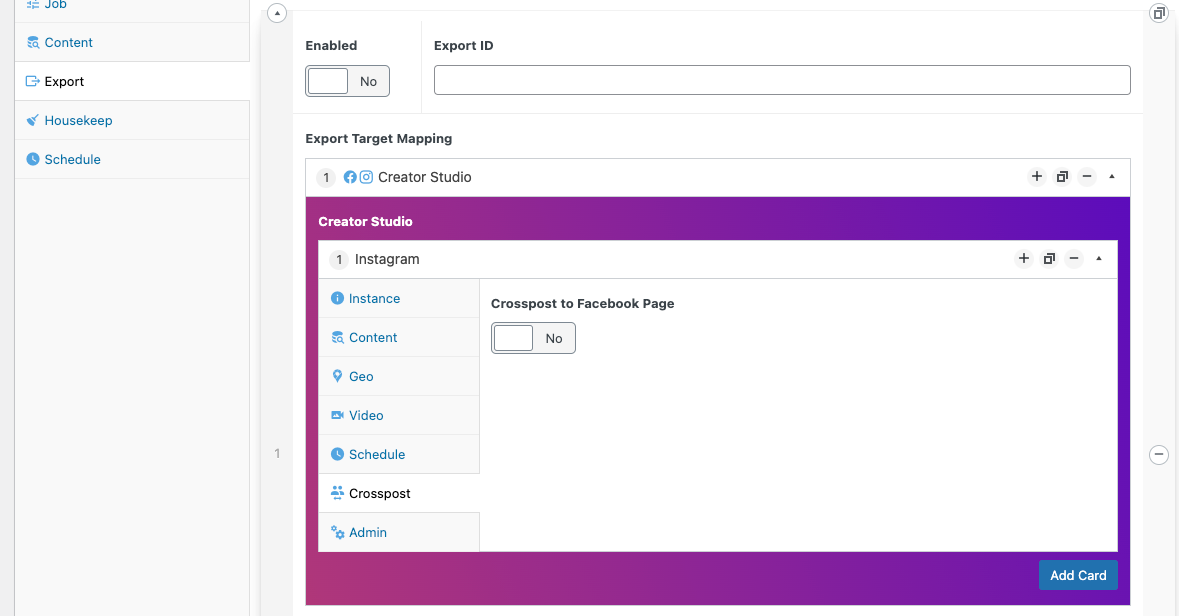
Crosspost
- Crosspost to Facebook. Any post will be sent to both Instagram and Facebook.
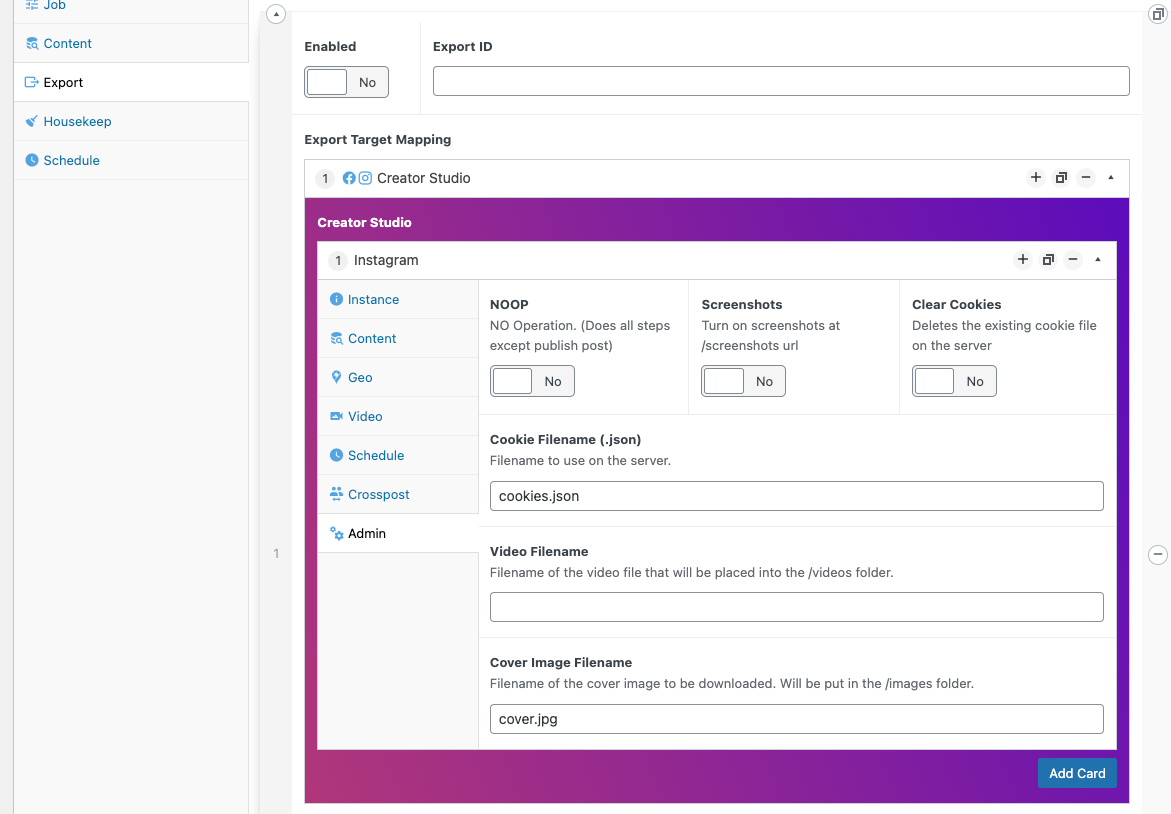
Admin
NOOP. No-Operation. Does all steps except for publish post. Good for debugging the steps.
Screenshots. Turn on screenshot debugging. The puppeteer script can take screenshots of every stage and output the results into the /screenshots path URL. This means you can debug when anything is not working before putting Chrome into "HEAD" mode and running locally in a DEV environment.
Clear Cookies. By default, the system will save cookies - this is so you don't have consistent login problems. Facebook/Instagram have hard login protections and without cookies set, you'll get issues with logging in.
Cookie Filename (.json). Name of the file to save the cookies to. cookies.json
Video Filename. Filename of the video file that will be placed into the /videos folder. video.mp4
Cover Image Filename. Filename of the cover image to be downloaded. Will be put in the /images folder. cover.jpg
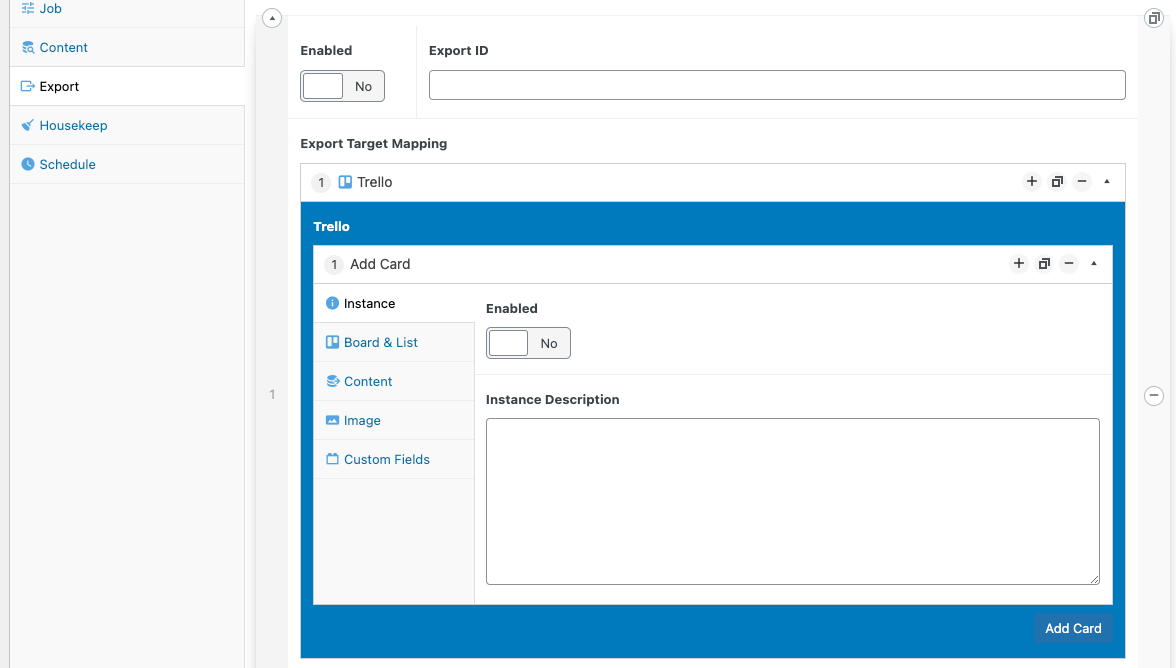
5.4. Trello
Instance
Enabled. Run this exporter or not.
Instance Description. Any extra notesfor yourself to remember about this exporter. What it does, where it goes, etc...
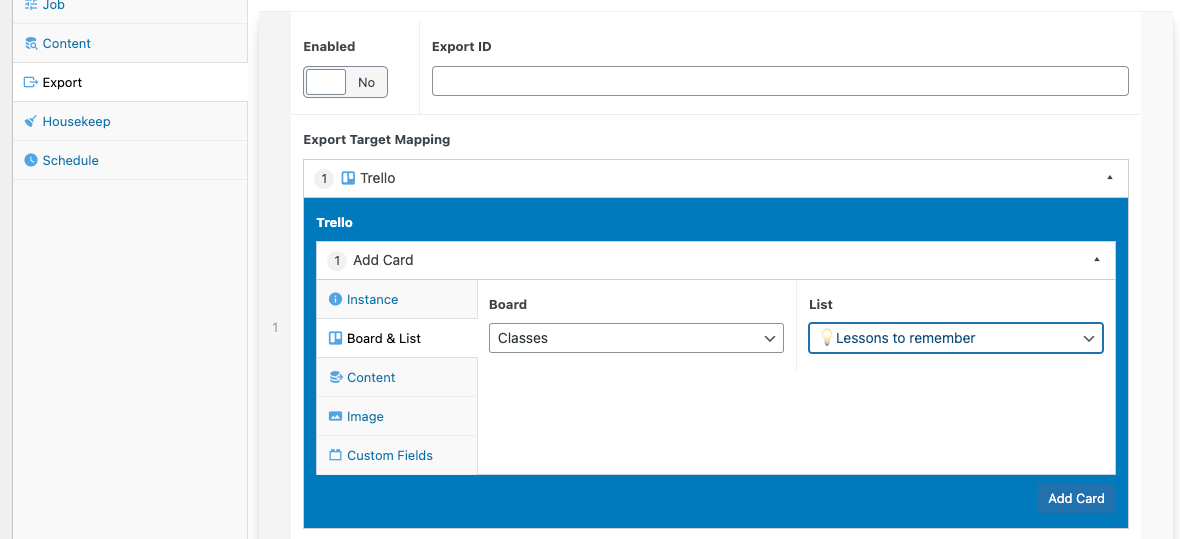
Board & List
Board. Which Trello board to add your card to. This field is auto populated when logged in. (Auto-populated field)
List. Which Trello list to add your card to. This field is auto populated when logged in. (Auto-populated field)
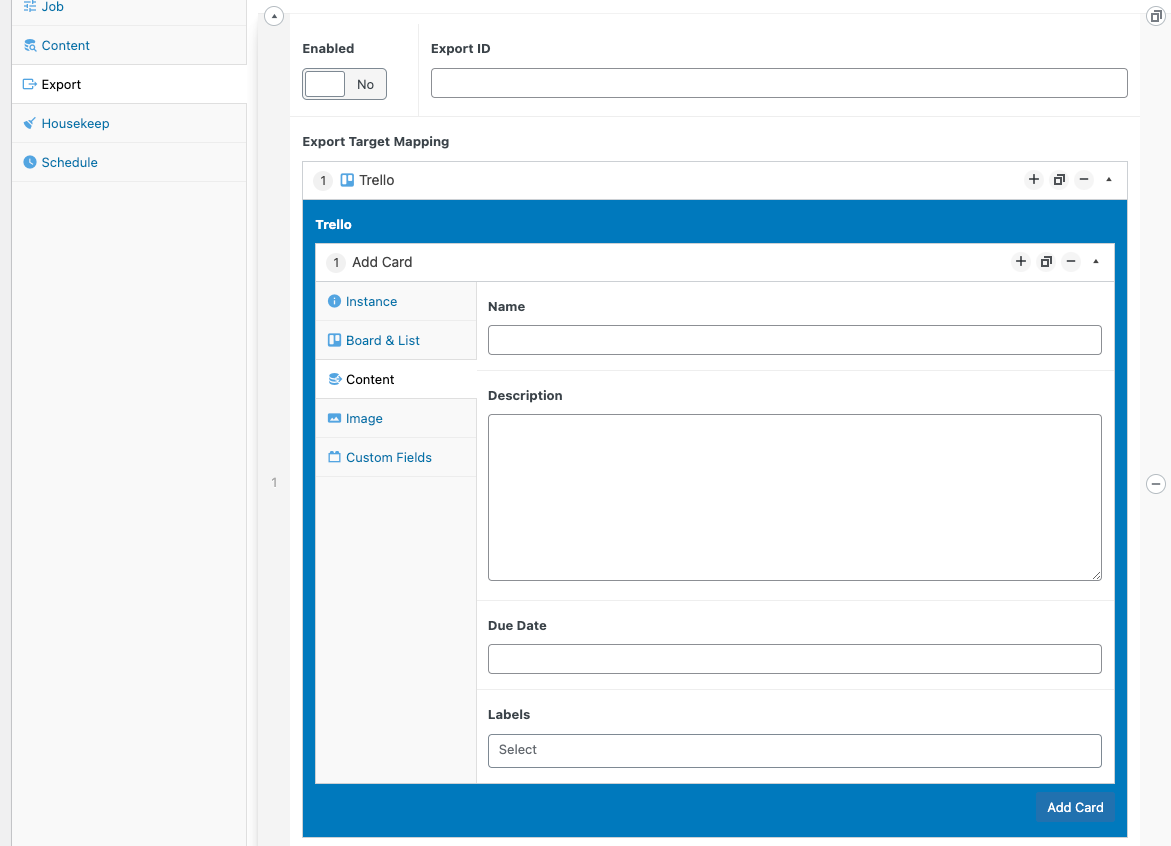
Content
Name. Title of the card to add to trello. You can use any of the available {{moustache}} variables.
Description. The description content added to the card. You can use any of the available {{moustache}} variables.
Due Date. DateTime of when the card is due.
Labels. Pick multiple labels from your existing label list. (Auto-populated field)
Image
- Source URL. The location of the image to to use on the card. You can use any of the available {{moustache}} variables.

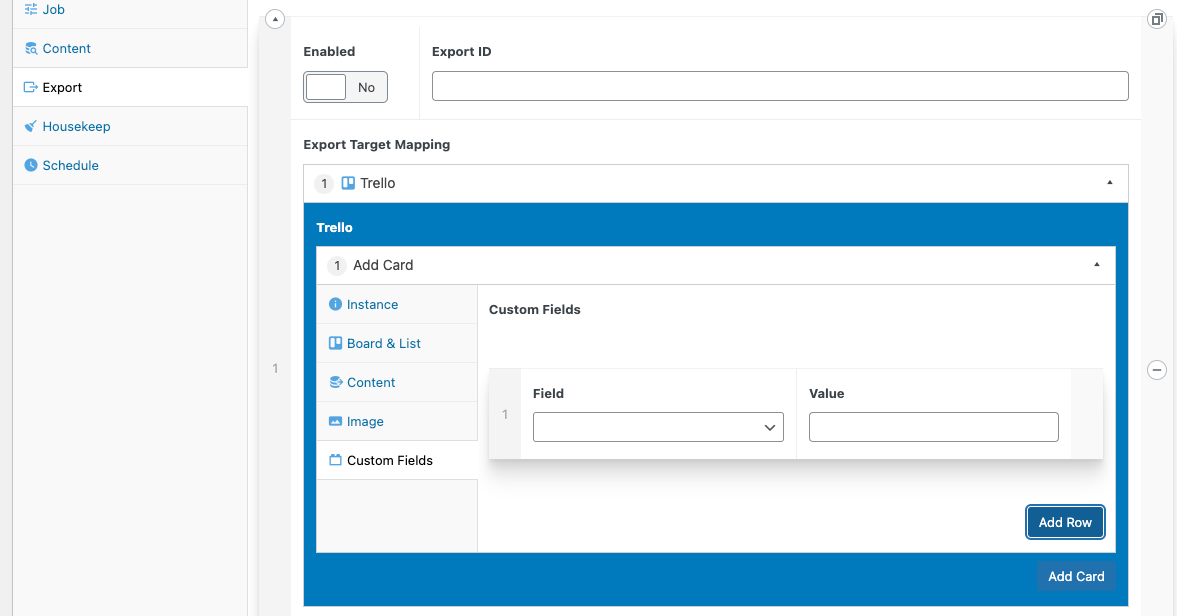
Custom Fields
If you use the "custom fields" add-on within Trello, you can also specify the values to add to those fields activated on the cards.
Any Fields found will be auto-populated in the 'fields' column dropdown box.
- Custom Fields. (row)
- Field. The name of the custom-field to fill in. (auto-populated dropdown - if none are listed, then custom-fields are not used on this board / list)
- Value. The value you want to add to this custom field. You can use any of the available {{moustache}} variables.
5.5. REST Endpoints
Description
- Description. Any extra notes for yourself to remember about this exporter. What it does, where it goes, etc...
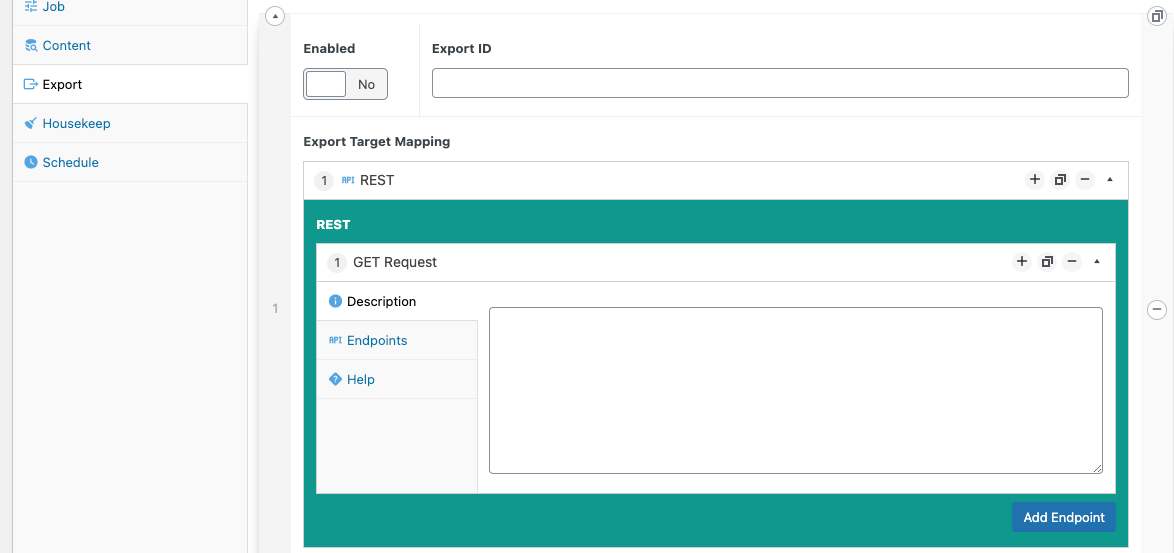
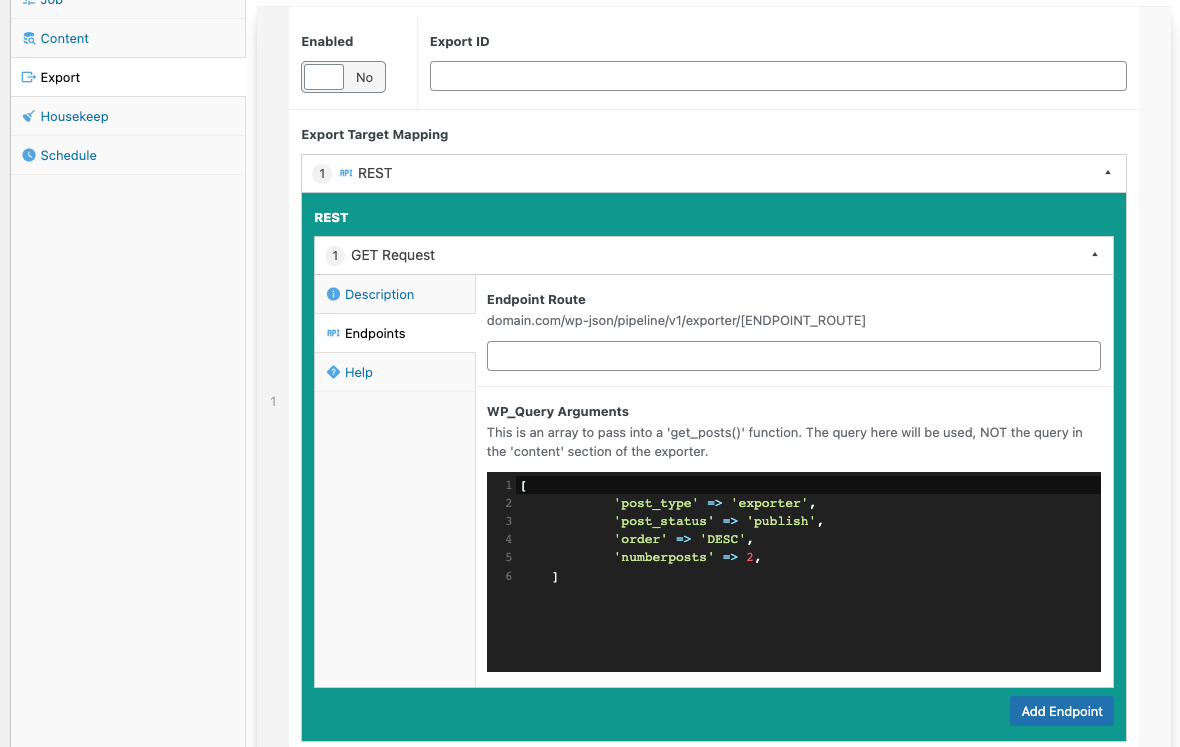
Endpoints
- Endpoint Route. Declare the name of the endpoint you are going to create. This URL can then be used to query for the post you are exporting.
domain.com/wp-json/pipeline/v1/exporter/[ENDPOINT_ROUTE_NAME]
You can use IFTTT.com or Zapier.com to query this new endpoint for the posts.
- WP_Query Arguments. This is an array to pass into a 'get_posts()' function. The query here will be used, NOT the query in the 'content' section of the exporter. The results will be displayed on the endpoint to be parsed.
An example:
['post_type' => 'exporter','post_status' => 'publish','order' => 'DESC','numberposts' => 2,]
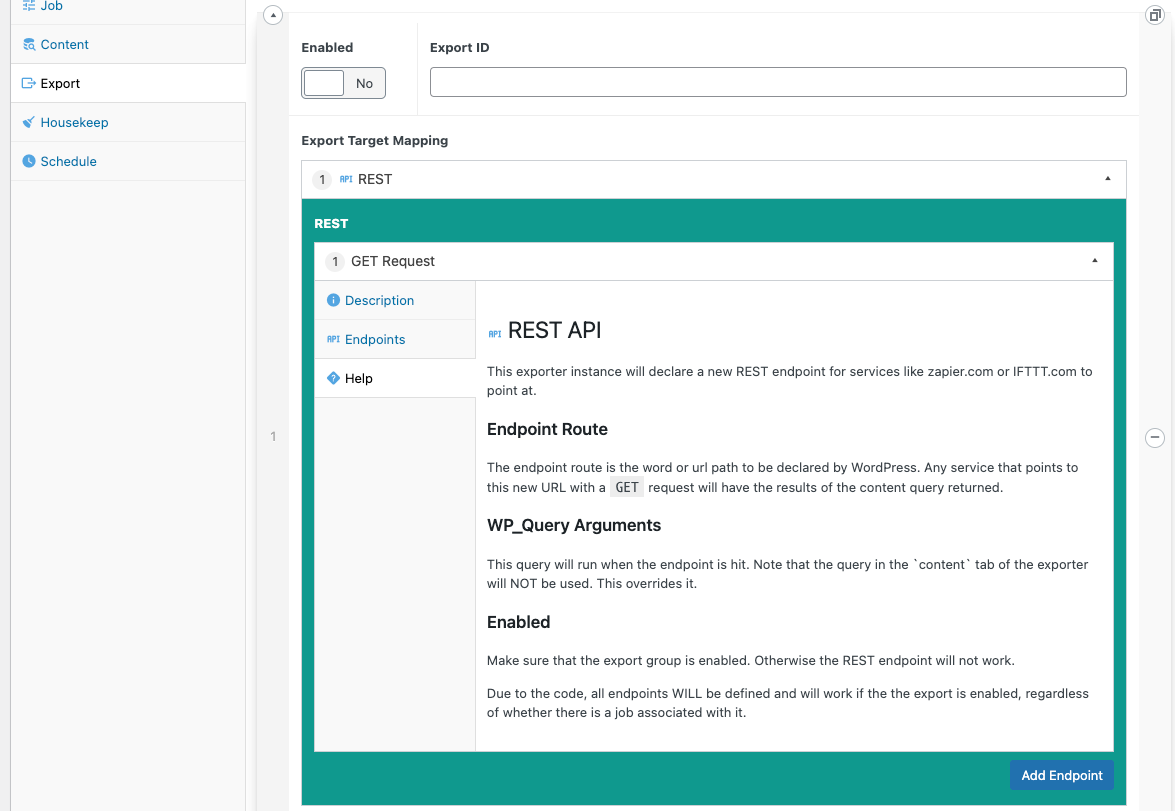
Help
Extra details for reference.
REST API
This exporter instance will declare a new REST endpoint for services like zapier.com or IFTTT.com to point at.
Endpoint Route
The endpoint route is the word or url path to be declared by WordPress. Any service that points to this new URL with a GET request will have the results of the content query returned.
WP_Query Arguments
This query will run when the endpoint is hit. Note that the query in the content tab of the exporter will NOT be used. This overrides it.
Enabled
Make sure that the export group is enabled. Otherwise the REST endpoint will not work.
Due to the code, all endpoints WILL be defined and will work if the the export is enabled, regardless of whether there is a job associated with it.
6. Custom Post Type.
This plugin also comes with a custom post type (CPT) called "exporter" that you can use to export your output to. This can be used as a intermediate step before exporting off to your third-party apps.
The "Exporter" CPT will appear in the admin sidebar sidemenu.
7. Troubleshooting
7.1. OAUTH Issues
- Ensure HTTPS is working. (Make sure cert is created and added to keychain)
- Ensure the address of the Authorised redirect URIs has the correct URIs in it's list.
https://dev.exporter.londonparkour.com/wp-admin/admin-ajax.php
Preferably at the top of the list.
- Ensure Authorised JavaScript origins in the google console APIs 'credentials' has your correct domain. domain: e.g.
https://dev.exporter.londonparkour.com
8. Contributing
Contributions are what make the open source community such an amazing place to learn, inspire, and create. Any contributions you make are greatly appreciated.
If you have a suggestion that would make this better, please fork the repo and create a pull request. You can also simply open an issue. Don't forget to give the project a star! Thanks again!
- Fork the Project
- Create your Feature Branch (git checkout -b feature/AmazingFeature)
- Commit your Changes (git commit -m 'Add some AmazingFeature')
- Push to the Branch (git push origin feature/AmazingFeature)
- Open a Pull Request
9. License
Distributed under the MIT License.
MIT License
Copyright (c) 2022 Andy Pearson
Permission is hereby granted, free of charge, to any person obtaining a copy of this software and associated documentation files (the "Software"), to deal in the Software without restriction, including without limitation the rights to use, copy, modify, merge, publish, distribute, sublicense, and/or sell copies of the Software, and to permit persons to whom the Software is furnished to do so, subject to the following conditions:
The above copyright notice and this permission notice shall be included in all copies or substantial portions of the Software.
THE SOFTWARE IS PROVIDED "AS IS", WITHOUT WARRANTY OF ANY KIND, EXPRESS OR IMPLIED, INCLUDING BUT NOT LIMITED TO THE WARRANTIES OF MERCHANTABILITY, FITNESS FOR A PARTICULAR PURPOSE AND NONINFRINGEMENT. IN NO EVENT SHALL THE AUTHORS OR COPYRIGHT HOLDERS BE LIABLE FOR ANY CLAIM, DAMAGES OR OTHER LIABILITY, WHETHER IN AN ACTION OF CONTRACT, TORT OR OTHERWISE, ARISING FROM, OUT OF OR IN CONNECTION WITH THE SOFTWARE OR THE USE OR OTHER DEALINGS IN THE SOFTWARE.
10. Contact
Author Link: https://github.com/IORoot
11. Changelog
- v1.0.0 - Initial Commit