

Shortcode : Sidebar Menu
Creates a wordpress sidebar menu tree that is fully collapsible and heirarchical.
1. Table of Contents
- 2.1. Built With
- 2.2. Installation
- 3.1. General.
- 3.2. Structure.
- 3.3. Taxonomy.
- 3.4. Wrapper.
- 3.5. Code.
- 3.5.1. Top-level <ul>
- 3.5.2. Top Level <\ul>
- 3.5.3. <ul>
- 3.5.4. </ul>
- 3.5.5. <li>
- 3.5.6. </li>
- 3.5.7. <a>
- 3.5.8. <\a>
- 3.5.9. Count number (66)
- 3.6. Style.
- 3.7. Shortcode.
2. About The Project
Creates a wordpress sidebar menu tree that is fully collapsible and heirarchical.
You can assign a Taxonomy to the sidebar and it will generate the full structure.
2.1. Built With
This project was built with the following frameworks, technologies and software.
2.2. Installation
These are the steps to get up and running with this plugin.
- Clone the repo into your wordpress plugin foldergit clone https://github.com/IORoot/wp-plugin__shortcode--sidebar-menu ./wp-content/plugins/shortcode-sidebar-tree
- Composer.cd ./wp-content/plugins/shortcode-sidebar-treecomposer install
3. Usage
The Sidebar Creator is accessible from the admin side menu.
It has five tabs with multiple sub-tabs.
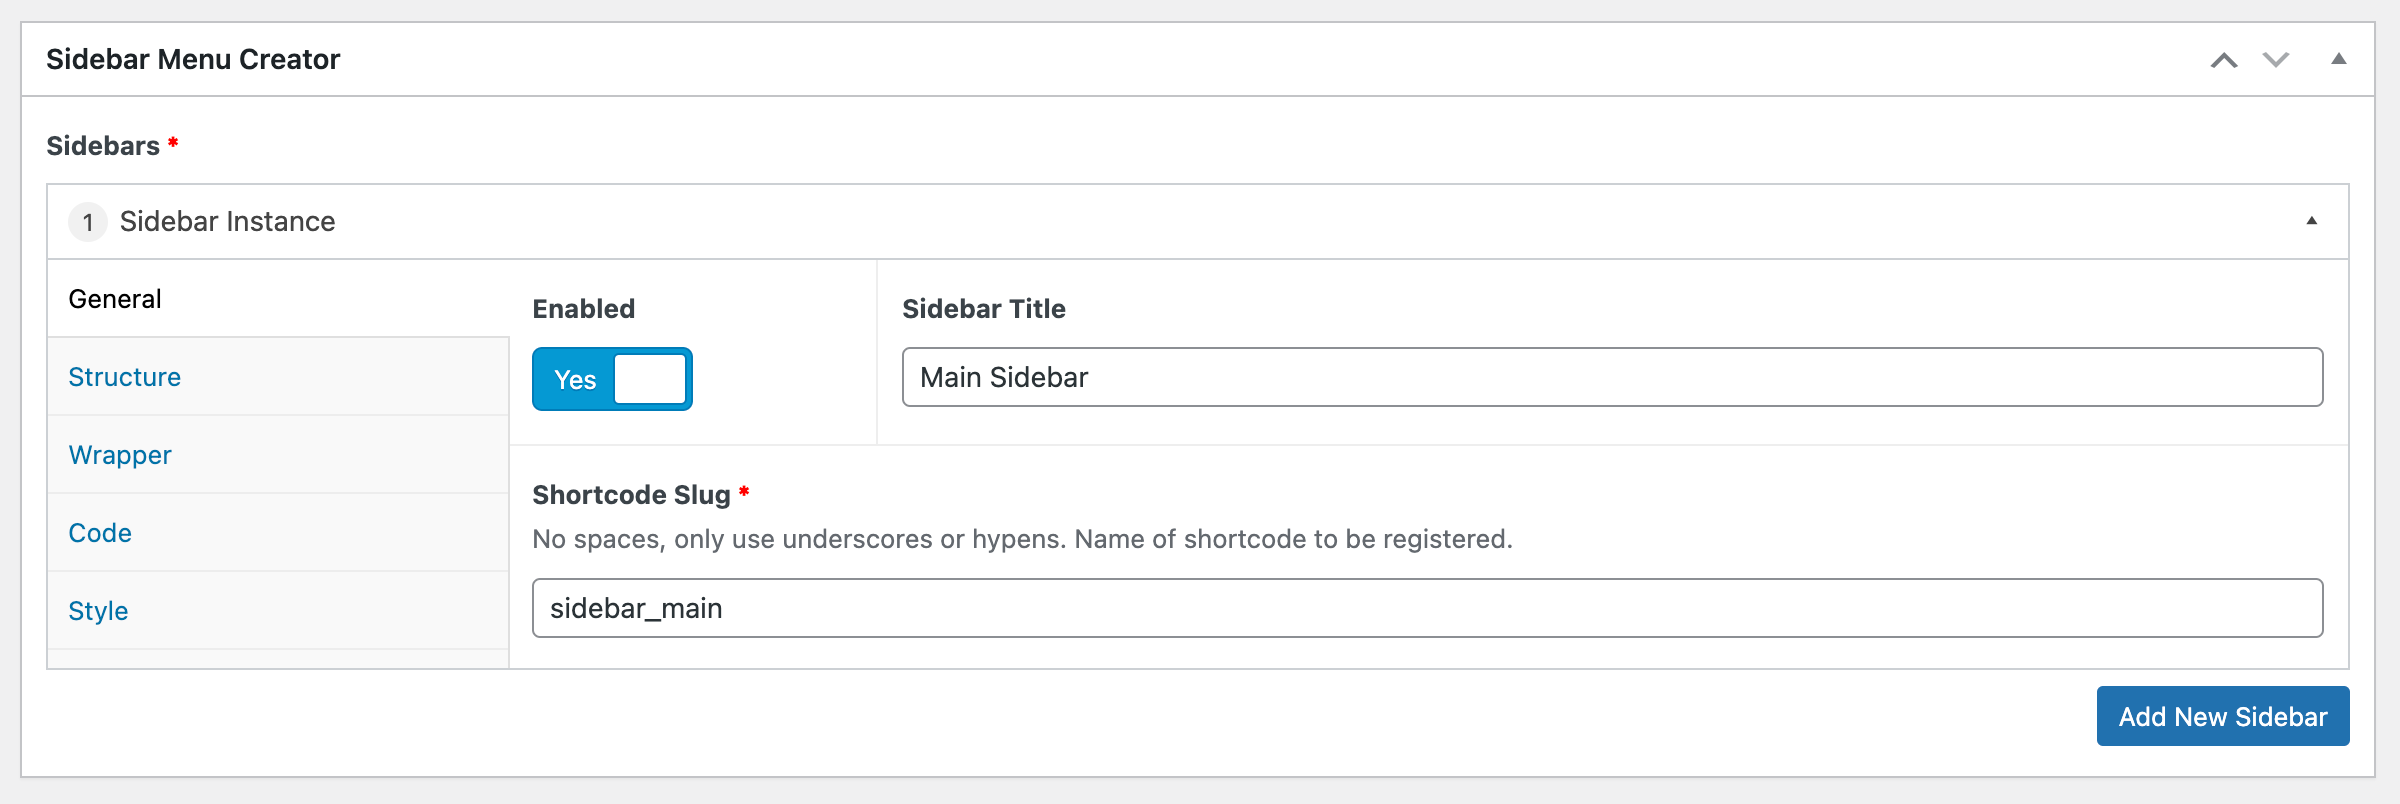
3.1. General.
- Enabled. Allow this to be rendered or not.
- Sidebar Title. Instance name of each particular sidebar.
- Shortcode Slug. No spaces, only use underscores or hypens. Name of shortcode to be registered. This will be used in the shortcode to reference this menu instance.
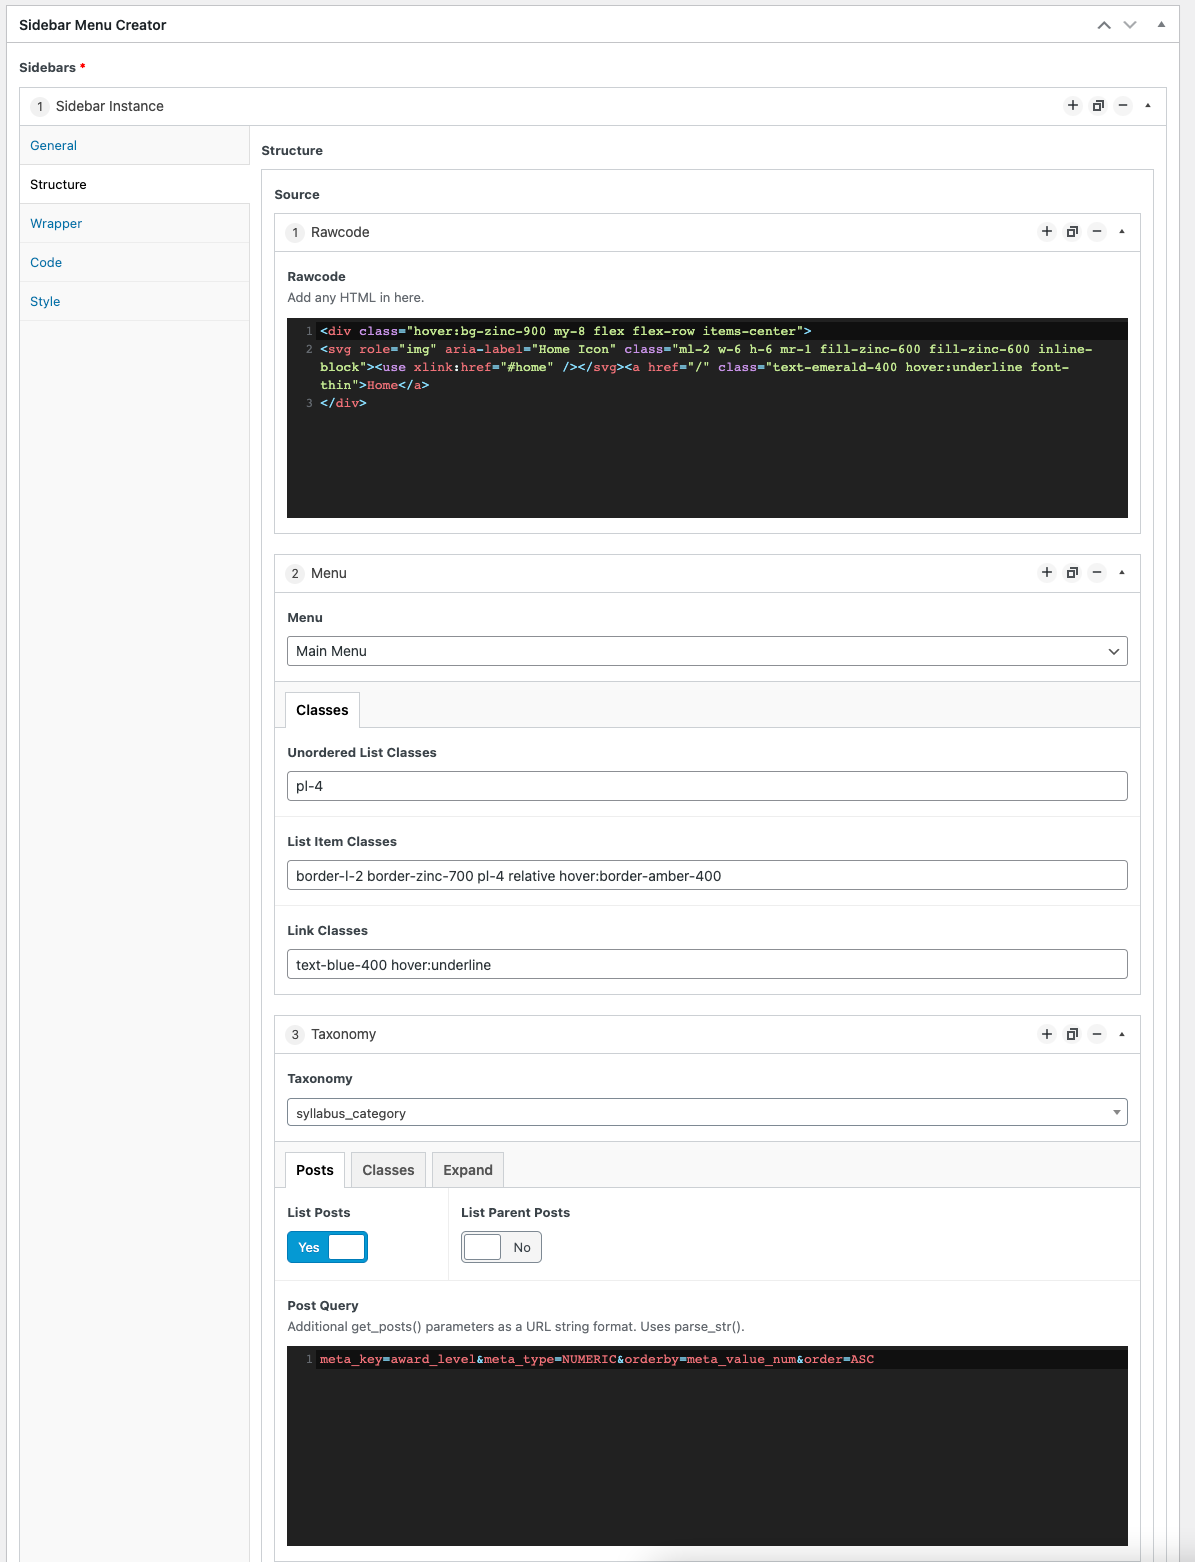
3.2. Structure.
The structure tab allows you to 'build' the menu items to be included.
- Structure (row). Add multiple rows of different content.
- Rawcode. Add raw HTML.
- Menu. Add the items from a registered wordpress menu.
- Taxonomy. Create a list of items linked to a taxonomy.
3.2.1. Rawcode.
The rawcode row allows you to add any HTML directly into the menu.
3.2.2. Menu.
- Menu. Select a registered wordpress menu.
- Classes.
- Unordered List Classes. The class names to give the wrapping <ul></ul> tags of the list.
- List Item Classes. The class names to give the <li></li> item tags.
- Link Classes. The class names to give the <a></a> link tags.
The menu is structured like so:
<ul><li><a href="/menu-item-page">Menu Item</a></li>...</ul>
3.3. Taxonomy.
The taxonomy row allows you to select a particular taxonomy and use each sub-category and term as a tree with links to each of those items.
Taxonomy. The taxonomy slug name. Pick from select box.
Posts. Specify how to get the items from the taxonomy.
- List Posts. Show the posts, not just the categories / sub-categories.
- List Parent Posts. Display the parent posts in the child list.
- Post Query. URL Query string of what to pass into the get_posts() function. e.g.meta_key=award_level&meta_type=NUMERIC&orderby=meta_value_num&order=ASC
Classes.
- Unordered List Classes. The class names to give the wrapping <ul></ul> tags of the list.
- List Item Classes. The class names to give the <li></li> item tags.
- Link Classes. The class names to give the <a></a> link tags.
Expand.
- Auto Expand. Automatically open menu up to current page.
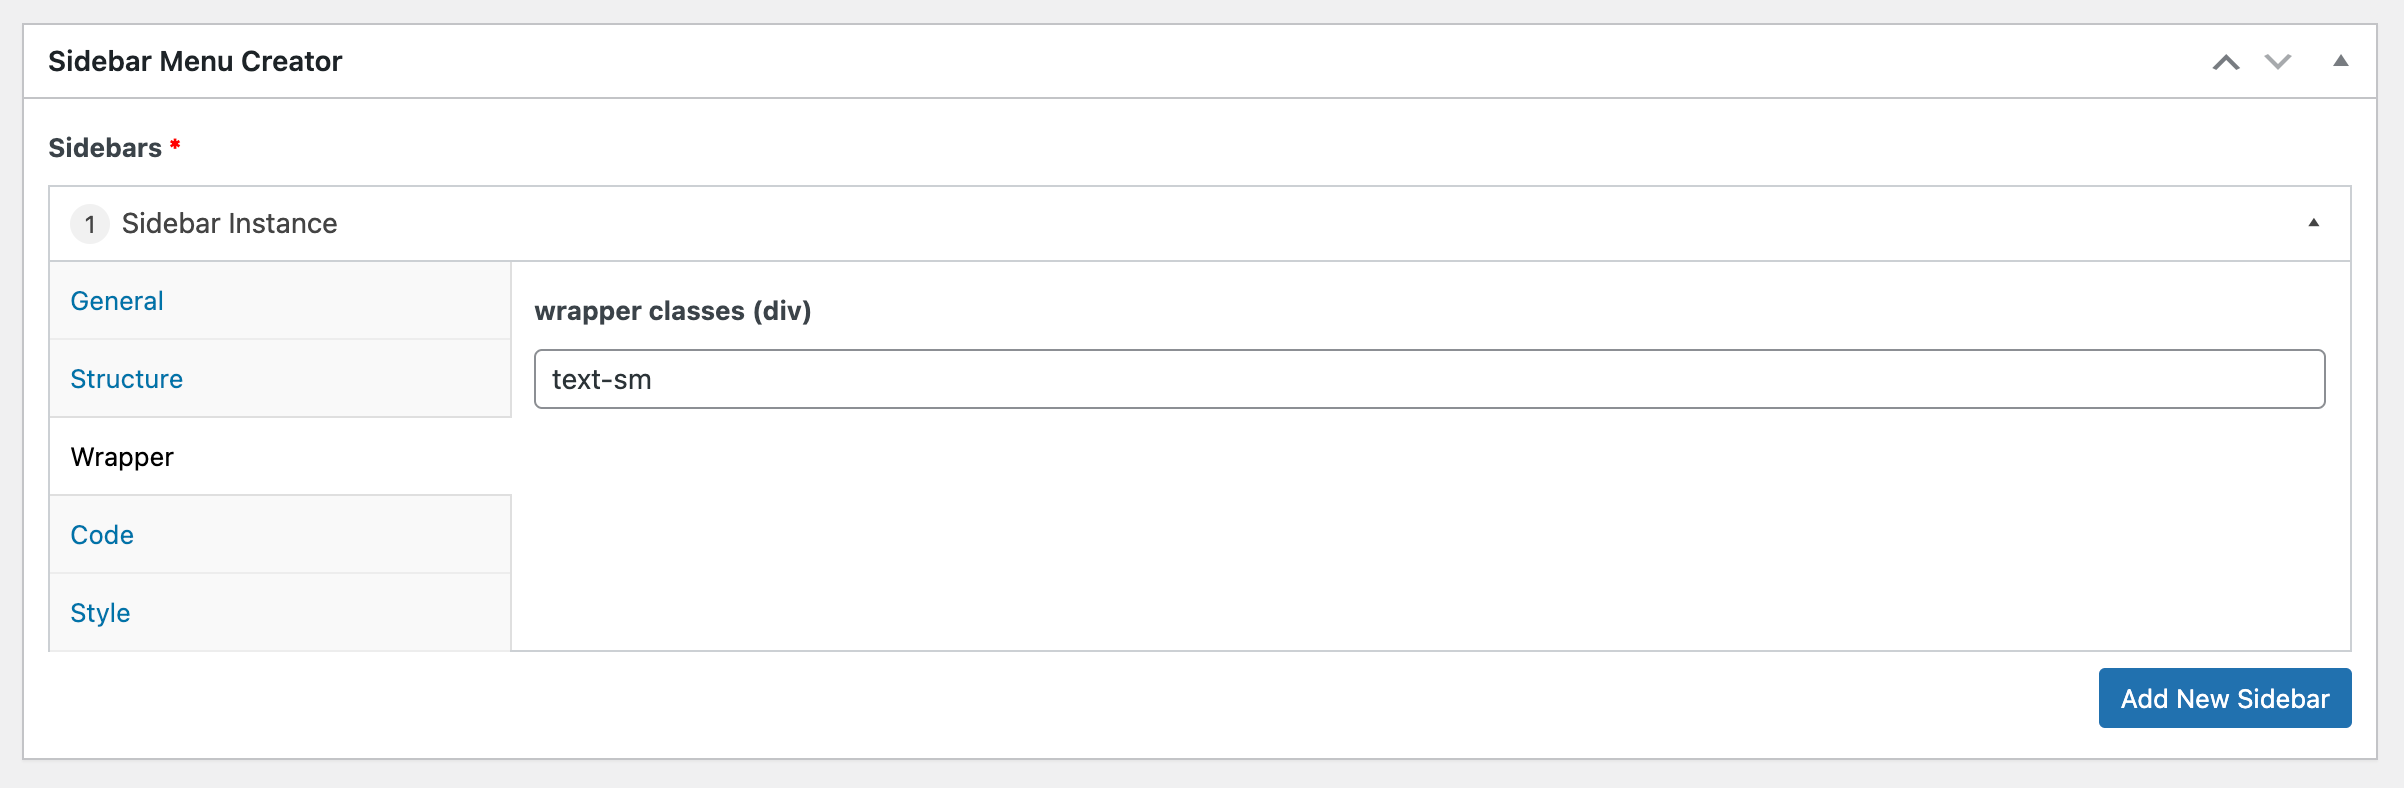
3.4. Wrapper.
- Wrapper Classes (DIV). Any class names to give the parent <DIV> container that wraps the menu.
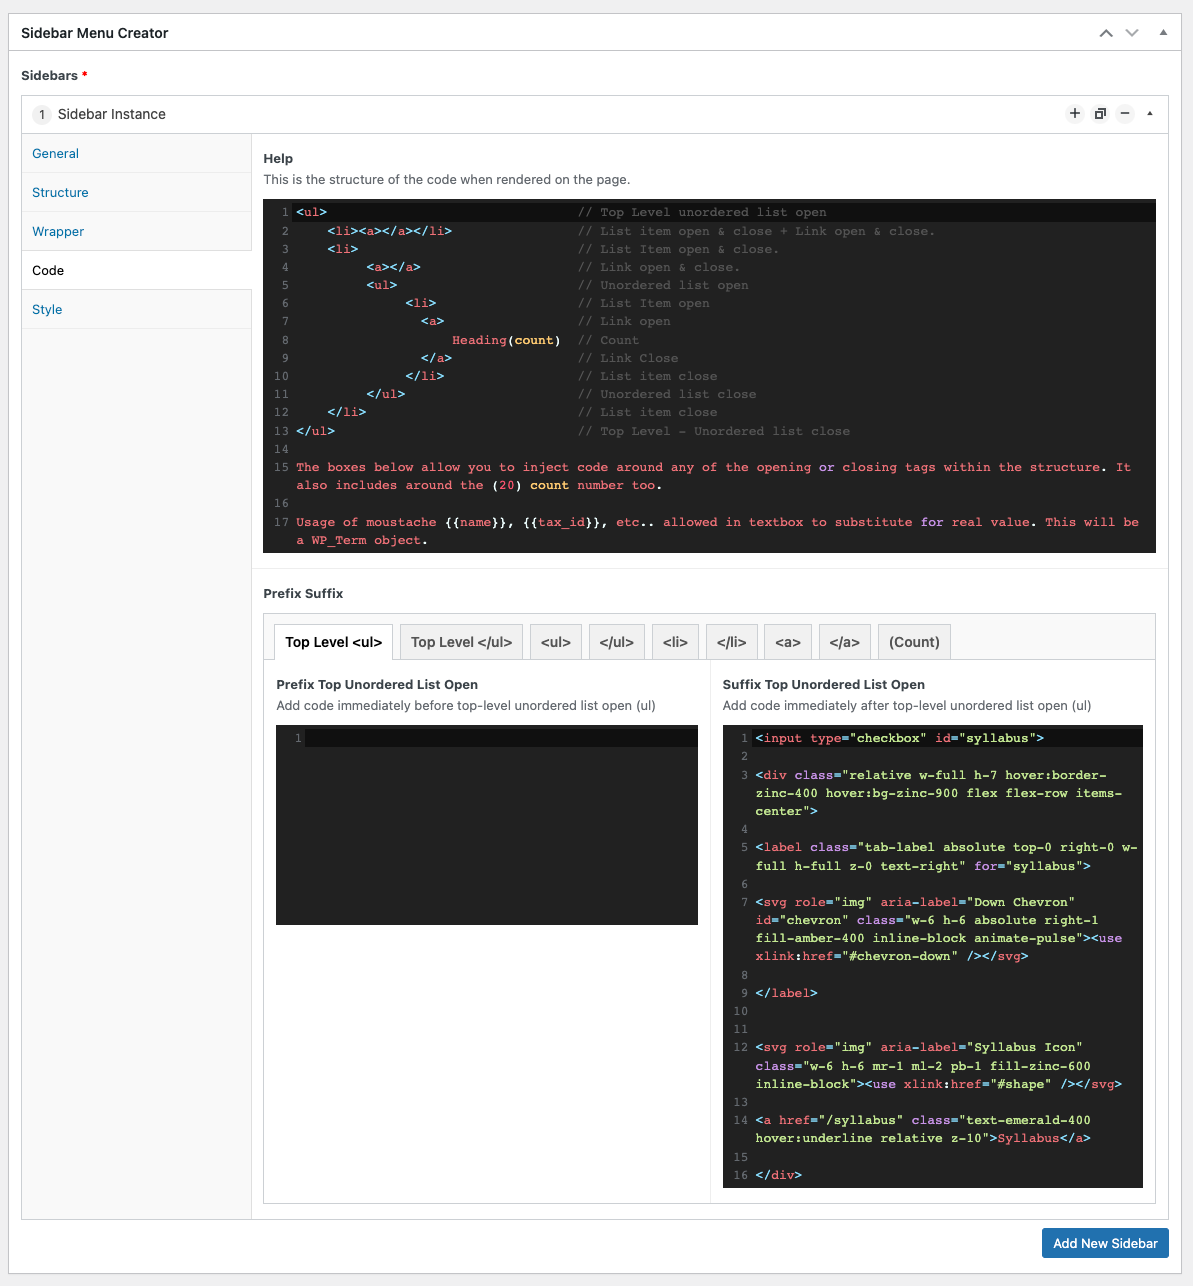
3.5. Code.
The code tab allows you to append code around any of the levels of the menu. Before or after each tag.
The structure of the menu is like so:
<ul> // Top Level unordered list open<li><a></a></li> // List item open & close + Link open & close.<li> // List Item open & close.<a></a> // Link open & close.<ul> // Unordered list open<li> // List Item open<a> // Link openHeading(count) // Count</a> // Link Close</li> // List item close</ul> // Unordered list close</li> // List item close</ul> // Top Level - Unordered list close
The textboxes allow you to inject code around any of the opening or closing tags within the structure. It also includes around the (20) count number too.
Usage of moustache {{name}}, {{tax_id}}, etc.. tags allowed in textbox to substitute for real value. This will be a WP_Term object and any of the fields in that can be used.
3.5.1. Top-level <ul>
Prefix Top Unordered List Open
Add code immediately before top-level unordered list open (ul)
Suffix Top Unordered List Open
Add code immediately after top-level unordered list open (ul)
3.5.2. Top Level <\ul>
Prefix Top Unordered List Close
Add code immediately before top-level unordered list close (/ul)
Suffix Top Unordered List Close
Add code immediately after top-level unordered list close (/ul)
3.5.3. <ul>
Prefix Unordered List Open
Add code immediately before unordered list open (ul)
Suffix Unordered List Open
Add code immediately after unordered list open (ul)
3.5.4. </ul>
Prefix Unordered List Close
Add code immediately before unordered list close (/ul)
Suffix Unordered List Close
Add code immediately after unordered list close (/ul)
3.5.5. <li>
Prefix List Item Open
Add code immediately before list item open (li)
Suffix List Item Open
Add code immediately after list item open (li)
3.5.6. </li>
Prefix List Item Close
Add code immediately before list item close (/li)
Suffix List Item Close
Add code immediately after list item close (/li)
3.5.7. <a>
Prefix Link Open
Add code immediately before opening (a) tag.
Suffix Link Open
Add code immediately after opening (a) tag.
3.5.8. <\a>
Prefix Link Close
Add code immediately before closing (\a) tag.
Suffix Link Close
Add code immediately after closing (\a) tag.
3.5.9. Count number (66)
Prefix Count
Add code immediately before (20) number count.
Suffix Count
Add code immediately after (20) number count.
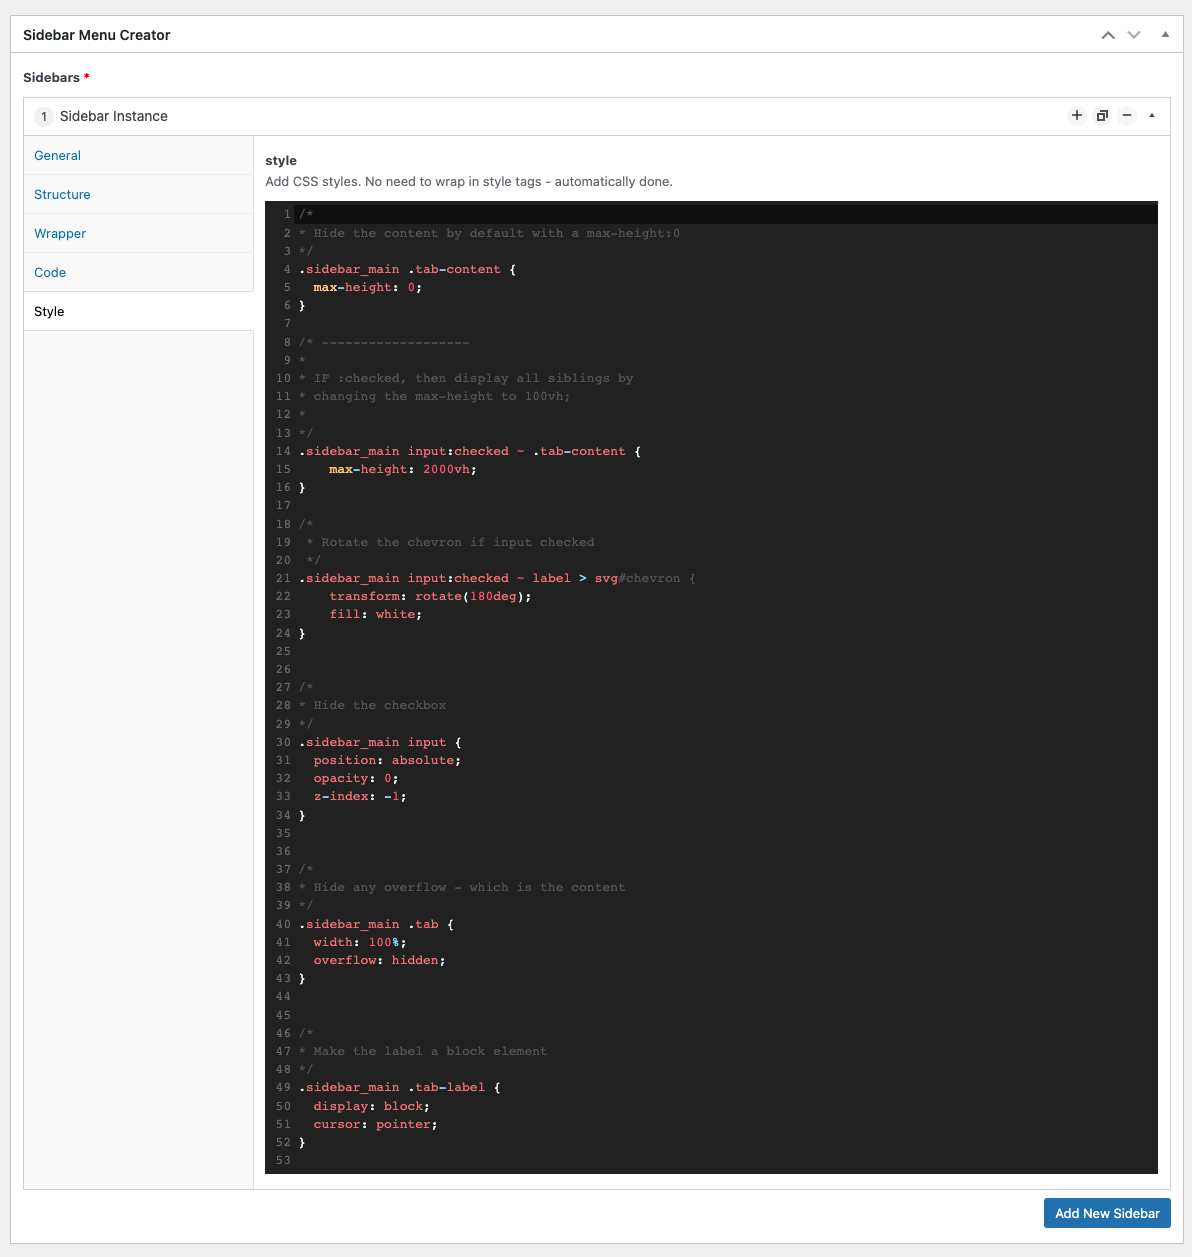
3.6. Style.
The style tab allows you to insert extra CSS inline above the menu. No need to wrap in style tags - automatically done.
Example code added on Syllabus website:
/** Hide the content by default with a max-height:0*/.sidebar_main .tab-content {max-height: 0;}/* -------------------** IF :checked, then display all siblings by* changing the max-height to 100vh;**/.sidebar_main input:checked ~ .tab-content {max-height: 2000vh;}/** Rotate the chevron if input checked*/.sidebar_main input:checked ~ label > svg#chevron {transform: rotate(180deg);fill: white;}/** Hide the checkbox*/.sidebar_main input {position: absolute;opacity: 0;z-index: -1;}/** Hide any overflow - which is the content*/.sidebar_main .tab {width: 100%;overflow: hidden;}/** Make the label a block element*/.sidebar_main .tab-label {display: block;cursor: pointer;}
3.7. Shortcode.
[sidebar_menu slug="test_sidebar"]
The slug is the one you give the menu in the general > shortcode slug field in the admin menu. This will then render the menu how you designed it.
4. Troubleshooting
none.
5. Contributing
Contributions are what make the open source community such an amazing place to learn, inspire, and create. Any contributions you make are greatly appreciated.
If you have a suggestion that would make this better, please fork the repo and create a pull request. You can also simply open an issue. Don't forget to give the project a star! Thanks again!
- Fork the Project
- Create your Feature Branch (git checkout -b feature/AmazingFeature)
- Commit your Changes (git commit -m 'Add some AmazingFeature')
- Push to the Branch (git push origin feature/AmazingFeature)
- Open a Pull Request
6. License
Distributed under the MIT License.
MIT License
Copyright (c) 2022 Andy Pearson
Permission is hereby granted, free of charge, to any person obtaining a copy of this software and associated documentation files (the "Software"), to deal in the Software without restriction, including without limitation the rights to use, copy, modify, merge, publish, distribute, sublicense, and/or sell copies of the Software, and to permit persons to whom the Software is furnished to do so, subject to the following conditions:
The above copyright notice and this permission notice shall be included in all copies or substantial portions of the Software.
THE SOFTWARE IS PROVIDED "AS IS", WITHOUT WARRANTY OF ANY KIND, EXPRESS OR IMPLIED, INCLUDING BUT NOT LIMITED TO THE WARRANTIES OF MERCHANTABILITY, FITNESS FOR A PARTICULAR PURPOSE AND NONINFRINGEMENT. IN NO EVENT SHALL THE AUTHORS OR COPYRIGHT HOLDERS BE LIABLE FOR ANY CLAIM, DAMAGES OR OTHER LIABILITY, WHETHER IN AN ACTION OF CONTRACT, TORT OR OTHERWISE, ARISING FROM, OUT OF OR IN CONNECTION WITH THE SOFTWARE OR THE USE OR OTHER DEALINGS IN THE SOFTWARE.
7. Contact
Author Link: https://github.com/IORoot
8. Changelog
v1.0.0 - initial version